Настройка microsoft remote desktop
Содержание:
- Как разрешить удаленные подключения к компьютеру
- #5. Royal TSX App For OS X
- Updates for version 10.2.4
- Remotix VNC & RDP
- Specific errors
- Credential Profiles
- Manage your user accounts
- Удаленный рабочий стол Chrome
- Updates for version 10.1.7
- GoToMyPC
- Zoho Assist
- Управляемые рабочие столы
- Updates for version 10.2.0
- Jump Desktop
Как разрешить удаленные подключения к компьютеру
Если Вы хотите подключиться к находящемуся в вашей локальной сети удаленному компьютеру, Вы должны убедиться, что на этом компьютере разрешены удаленные подключения.
Важно! Приложение «Удаленный рабочий стол» работает только с редакциями операционной системы Windows 10 не ниже Pro (Профессиональная)
Для того, чтобы разрешить подключения к удаленному компьютеру, выполните на нем следующие действия:
- Откройте «Панель управления»;
- Зайдите в раздел «Система»;
- Выберите пункт «Защита системы»;
- Выберите вкладку «Удаленный доступ»;
- Активируйте пункт «Разрешить удаленные подключения к этому компьютеру»;
- Нажмите на кнопку «ОК»;
- Нажмите на кнопку «Применить»;
- Снова нажмите «ОК», чтобы завершить задачу.
Если Вы все сделали правильно, теперь ваш компьютер будет поддерживать удаленные подключения по локальной сети.
Если Вы хотите получить доступ к этому компьютеру через Интернет, внимательно прочитайте следующий раздел.
Как настроить удаленный доступ к компьютеру через Интернет
Если Вы хотите получить удаленный доступ к компьютеру через Интернет, в дополнение к настройкам системы, вам необходимо произвести некоторые дополнительные настройки.
Как настроить на компьютере статический IP-адрес
Для того, чтобы в Windows 10 подключиться к удаленному рабочему столу, вам понадобится IP-адрес компьютера, который может быть статическим или динамическим. Первый является более предпочтительным, так как компьютер все время использует один и тот же адрес. В случае же с динамическим, IP-адрес меняется при каждой перезагрузке компьютера, из-за чего работать с удаленным компьютером не получится. Чтобы решить проблему, необходимо присвоить компьютеру статический IP-адрес. Для этого:
- Откройте «Панель управления»;
- Зайдите в «Центр управления сетями и общим доступом»;
- Выберите пункт «Изменение параметров адаптера»;
- Кликните правой кнопкой мыши по текущему подключению, и выберите «Свойства»;
- Выберите «IP версии 4 (TCP/IPv4)»;
- Нажмите на кнопку «Свойства»;
- Активируйте пункт «Использовать следующий IP-адрес»;
- Введите действительный локальный IP-адрес, который находится вне сферы действия DHCP (во избежание конфликтов IP-адресов в сети). Например: (Вы можете найти эту информацию в разделе «Настройки DHCP» вашего маршрутизатора);
- Введите Маску подсети. В большинстве домашних сетей, это следующее значение: ;
- В разделе «Основной шлюз» введите IP-адрес маршрутизатора. Например: 10.1.2.1.;
- В разделе «Использовать следующие адреса DNS-серверов» не забудьте ввести IP-адрес вашего DNS-сервера, который в большинстве случаев является IP-адресом маршрутизатора. (Если Вы не можете подключиться к Интернету, Вы можете попробовать использовать Google Public DNS адреса: 8.8.4.4 и 8.8.8.8);
- Нажмите на кнопку «ОК»;
- Нажмите на кнопку «Закрыть», чтобы завершить задачу.
Как найти публичный IP-адрес вашего компьютера
Если Вы хотите получить возможность удаленного подключения к вашему компьютеру через Интернет, чтобы связаться с устройством, вам необходимо знать ваш публичный IP-адрес.
Самым простым способом найти ваш публичный IP-адрес является следующий:
Откройте веб-браузер, и зайдите на сайт В верхней части страницы Вы увидите адрес, который и является вашим публичным IP.
Имейте в виду, что большинство интернет-провайдеров предлагают для своих потребителей динамические общедоступные IP-адреса, а это значит, что ваш публичный IP-адрес может время от времени меняться.
Как настроить на маршрутизаторе TCP-порт 3389
Чтобы разрешить удаленные подключения через Интернет к определенному компьютеру, находящемуся в локальной сети, вам необходимо настроить на сетевом маршрутизаторе TCP-порт 3389. Для этого:
Запустите «Командную строку»;
Введите команду ipconfig и нажмите Enter:
Обратите внимание на IPv4-адрес, который идентифицирует ваш компьютер в локальной сети. Кроме того, обратите внимание на основной шлюз, который является IPv4-адресом маршрутизатора;
- Откройте веб-браузер;
- Введите в строке поиска IPv4-адрес вашего роутера и нажмите Enter;
- Войдите на страницу маршрутизатора, используя ваш логин и пароль;
- Просмотрите список доступных настроек и найдите раздел «Port Forwarding»;
- Убедитесь, что эта функция включена;
- Под списком «Port Forwarding» добавьте следующие данные:
Название службы: Вы можете использовать любое имя, которое хотите;
Диапазон портов: введите TCP порт номер 3389;
Локальный IP: введите IPv4-адрес вашего компьютера. Например: ;
Локальный порт: введите тот же номер TCP порта 3389;
Протокол: выберите TCP.
- Убедитесь, что данные были добавлены в настройки маршрутизатора;
#5. Royal TSX App For OS X
 Download Royal TSX For Mac
Royal TSX is the perfect tool for server admins, system engineers, developers, and IT-focused information workers using OS X, who constantly need to access remote systems with different protocols.
Main Features:
- Access and manage your connections
- Credential management
- Tabbed user interface
- Connection Plugins (Currently available: Remote Desktop, VNC, Apple Remote Desktop, SSH, Telnet, Web)
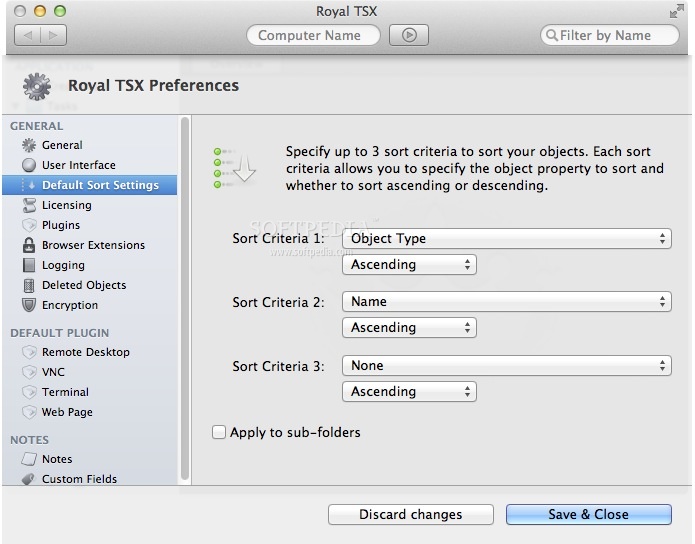
Royal TSX App Screenshot
Royal tsx app for el capitan
Royal tsx app for osx
Royal tsx app settings
Royal tsx app remote desktop
Quick Links: Microsoft Office Alternatives on Mac & iTunes Alternatives on Mac
Post Views:
46,069
Updates for version 10.2.4
Date published: 12/18/2018
- Added dark mode support for macOS Mojave 10.14.
- An option to import from Microsoft Remote Desktop 8 now appears in the Connection Center if it is empty.
- Addressed folder redirection compatibility with some third-party enterprise applications.
- Resolved issues where users were getting a 0x30000069 Remote Desktop Gateway error due to security protocol fallback issues.
- Fixed progressive rendering issues some users were experiencing with fit to window mode.
- Fixed a bug that prevented file copy and paste from copying the latest version of a file.
- Improved mouse-based scrolling for small scroll deltas.
Remotix VNC & RDP
Remotix is an extremely fast, slick and user-friendly remote desktop connection client for Mac.
In fact, If you just need to share the screen of your iPad or iPhone with your Mac, then there are few better RDP clients around.
There’s very little lag in connections made with Remotix to Windows either as it quickly optimizes itself for the speed of your internet connection.
For those new to remote desktop connections, it guides you clearly through the setup process. You can store connection profiles via iCloud backup and even access printers from your remote Mac using Remotix.
You can clearly see how many connections you’ve got open via the Multiple Computer Observer screen:

Remotix is also one of the most secure RDP clients for Mac available with built-in SSH tunneling for both RDP and VNC.
You can also set a master password to protect all of your connections rather than have to enter individual passwords for each one.
If you’ve been having problems with Back to My Mac, or just want to connect to Macs, Remotix is definitely worth checking-out.
Pricing: Starts at $49.95
Specific errors
You are not allowed to access the session you want to connect to. The most likely cause is that you are trying to connect to an admin session. Only administrators are allowed to connect to the console. Verify that the console switch is off in the advanced settings of the remote desktop. If this is not the source of the problem, please contact your system administrator for further assistance.
When a remote desktop client connects to a Remote Desktop server, the server issues a Remote Desktop Services Client Access License (RDS CAL) stored by the client. Whenever the client connects again it will use its RDS CAL and the server will not issue another license. The server will issue another license if the RDS CAL on the device is missing or corrupt. When the maximum number of licensed devices is reached the server will not issue new RDS CALs. Contact your network administrator for assistance.
The «Access Denied» error is a generated by the Remote Desktop Gateway and the result of incorrect credentials during the connection attempt. Verify your username and password. If the connection worked before and the error occurred recently, you possibly changed your Windows user account password and haven’t updated it yet in the remote desktop settings.
In case of an RPC error 23014 or Error 0x59E6 try again after waiting a few minutes, the RD Gateway server has reached the maximum number of active connections. Depending on the Windows version running on the RD Gateway the maximum number of connections differs: The Windows Server 2008 R2 Standard implementation limits the number of connections to 250. The Windows Server 2008 R2 Foundation implementation limits the number of connections to 50. All other Windows implementations allow an unlimited number of connections.
This error is caused by a misconfiguration on the remote PC. Make sure the RDP security level setting on the remote PC is set to «Client Compatible.» (Talk to your system admin if you need help doing this.)
This error happens when a Resource Authorization Policy on the gateway server stops your user name from connecting to the remote PC. This can happen in the following instances:
- The remote PC name is the same as the name of the gateway. Then, when you try to connect to the remote PC, the connection goes to the gateway instead, which you probably don’t have permission to access. If you need to connect to the gateway, do not use the external gateway name as PC name. Instead use «localhost» or the IP address (127.0.0.1), or the internal server name.
- Your user account isn’t a member of the user group for remote access.
Credential Profiles
Credential profiles store logon credentials globally to RDCMan or in a file. This allows for using the same stored credentials across groups that do not have a common ancestor. One use scenario is to store credentials used for logging into servers and gateways in a single place. When a password changes, it can be edited once. Another scenario is when sharing RDG files across a group. Instead of storing passwords in the file (which would have issues due to the user-specific nature of the encryption RDCMan uses), a profile is created such as «Me» which each user defines in their Global store.
You can update the settings for a credential profile in two ways. The first is to edit from a credentials dialog and then save the exact same profile name/domain to the same store (file or global). That will ask if you want to update. The other way is to go to the group properties for the credential store (again, file or global) and use the Profile Management tab.
File scope credential profile passwords are encrypted according to the containing file’s Encryption Settings. Global credential profiles use the Default Group Settings.
Manage your user accounts
When you connect to a desktop or remote resources, you can save the user accounts to select from again. You can manage your user accounts by using the Remote Desktop client.
To create a new user account:
- In the Connection Center, select Settings > Accounts.
- Select Add User Account.
- Enter the following information:
- User Name — The name of the user to save for use with a remote connection. You can enter the user name in any of the following formats: user_name, domain\user_name, or user_name@domain.com.
- Password — The password for the user you specified. Every user account that you want to save to use for remote connections needs to have a password associated with it.
- Friendly Name — If you are using the same user account with different passwords, set a friendly name to distinguish those user accounts.
- Select Save, then select Settings.
Удаленный рабочий стол Chrome

Удаленный рабочий стол Chrome — одно из самых популярных приложений для удаленного рабочего стола для Mac. Ранее он был доступен только как расширение Chrome. Однако теперь у него также есть версия приложения Chrome Desktop, которую вы можете добавить на свой Mac всего одним щелчком мыши. Он отображается на панели запуска, и с ним легко и быстро работать.
Помимо устройства MacOS, вы можете использовать Удаленный рабочий стол Chrome в качестве приложения для iOS. В целом, настроить удаленный доступ к рабочему компьютеру или ноутбуку несложно, установив программное обеспечение Chrome Remote Desktop. Мы начали список с бесплатного пункта и заканчиваем его этим, который также является бесплатным. Дать ему шанс.
Цена: Бесплатно
Вот и все, ребята!
Как объяснялось выше, существует довольно много хороших приложений для удаленного рабочего стола для Mac, которые позволяют вам получать доступ к другим системам и управлять ими. Эти инструменты необходимы для обслуживания клиентов, совместной работы в команде и многого другого. Каждое приложение предлагает несколько различных функций, которые могут удовлетворить различные типы бизнес-потребностей.
Updates for version 10.1.7
Date published: 04/05/2018
- Made security fixes to incorporate CredSSP encryption oracle remediation updates as described in CVE-2018-0886.
- Improved RemoteApp icon and mouse cursor rendering to address reported mispaints.
- Addressed issues where RemoteApp windows appeared behind the Connection Center.
- Fixed a problem that occurred when you edit local resources after importing from Remote Desktop 8.
- You can now start a connection by pressing ENTER on a desktop tile.
- When you’re in full screen view, Cmd+M now correctly maps to WIN+M.
- The Connection Center, Preferences, and About windows now respond to Cmd+M.
- You can now start discovering feeds by pressing ENTER on the **Adding Remote Resources*- page.
- Fixed an issue where a new remote resources feed showed up empty in the Connection Center until after you refreshed.
GoToMyPC
GoToMyPC For Mac isn’t the cheapest remote desktop software for Mac but it is incredibly easy to use and offers rock solid reliability.
GoToMyPC is owned by Citrix which are one of the biggest players in the remote desktop market although the GoToMyPC app is developed and maintained by the LogMeIn brand.
GoToMyPC For Mac is suitable for home users, small businesses and corporations as it sets-up everything automatically even if you’re behind a corporate firewall on Mac or PC.
As a result, GoToMyPC is a particularly popular choice among companies and corporations that allow employees to work from home.
GoToMyPC is extremely easy to setup and use and allows you to transfer files between Macs and Windows PCs.
It’s also one of the most secure remote desktop tools we’ve used as it protects each computer connected to it with an individual password so that no one else can access your network except authorized users.
We also like the fact that GoToMyPC allows you to temporarily invite another user into a session which is useful if you need tech support to fix a problem with your Mac or PC.

GoToMyPC also has an iOS app which allows you to easily connect to your Mac or PC from your iPhone or iPad.
GoToMyPC pricing starts at $35 per month for individuals but If you’re a small business and need to up to 50 computers, you need to sign-up to the Pro Plan which costs $66 per 2 computers per month.
For large enterprises and companies, you can connect to 1000+ users although pricing for this is on demand.
You can also try a free trial of GoToMyPC with no credit card needed.
You can also check out our full GoToMyPC review for more.
Pricing: Starts at $35/month
Zoho Assist
If you’re looking for a remote support solution for your Mac, Zoho Assist is the best remote desktop software for Mac specializing in both remote helpdesk and unattended remote access of both Macs and PCs.
Zoho Assist is a popular all round remote access software that’s not just for customer support but also makes it ridiculously easy to connect, access or control another computer or mobile device.
It’s also probably the best deal on the market for remote access software on this level with a limited Free Forever plan and paid plans starting at just $10 per month.

Although Zoho Assist can be used by anyone, it’s ideal for Customer Support and IT Professionals, IT Help Desks, Outsourced IT and MSP Support.
Some of the nice advanced touches in Zoho Assist include remote printing and custom branding of your company or organization.
Zoho Assist is also one of the most secure remote desktop tools for Mac users with no prior installation required at either end.
There are a range of extra security measures taken by Zoho Assist such as two factor authentication, SSL and 256-bit encryption and action log viewer to see who’s accessing your network in real time.
You can try Zoho Assist free to see for yourself.
You can also read our full review of Zoho Assist for more.
Pricing: Limited Free Forever plan / Paid plans start at $10 per month
Управляемые рабочие столы
Рабочие области могут содержать несколько управляемых ресурсов, включая рабочие столы. При обращении к управляемому рабочему столу предоставляется доступ ко всем приложениям, установленным администратором.
Параметры рабочего стола
Вы можете настроить некоторые параметры ресурсов рабочего стола в соответствии со своими потребностями. Чтобы открыть список доступных параметров, щелкните правой кнопкой мыши ресурс рабочего стола и выберите Параметры.
Клиент будет использовать параметры, настроенные администратором, если только не отключить параметр Использовать параметры по умолчанию. Это позволит настроить приведенные ниже параметры.
-
Конфигурация дисплеев — выбор дисплеев, которые можно использовать для сеанса рабочего стола. Влияет на то, какие дополнительные параметры доступны.
- All displays (Все дисплеи) — сеанс всегда будет использовать все локальные дисплеи, даже если некоторые из них будут добавлены или удалены позже.
- Single display (Один дисплей) — сеанс всегда будет использовать один дисплей с возможностью настройки его свойств.
- Select displays (Выбранные дисплеи) — позволяет выбрать, какие из дисплеев будут использоваться для сеанса, и включить динамическое изменение списка дисплеев во время сеанса.
- Select the displays to use for the session (Выберите экраны для этого сеанса) указывает, какие локальные экраны нужно использовать для сеанса. Все выбранные экраны должны размещаться радом друг с другом. Этот параметр доступен только в режиме Select displays (Выбранные дисплеи).
- Maximize to current displays (Развернуть до текущих дисплеев) — определяет, какие дисплеи будут использовать сеансы при переходе в полноэкранный режим. При включении этого параметра изображение сеанса переходит в полноэкранный режим на дисплеях, связанных с окном сеанса. Это позволяет менять дисплеи во время сеанса. Если этот параметр отключен, изображение сеанса переходит в полноэкранный режим на том же дисплее, на котором он в последний раз был в полноэкранном режиме. Этот параметр доступен только в режиме Select displays (Выбранные дисплеи) и отключен в других случаях.
- Single display when windowed (Один дисплей, если в оконном режиме) — определяет, какие дисплеи доступны в сеансе при выходе из полноэкранного режима. Если этот параметр включен, сеанс переключается на один дисплей в оконном режиме. Если этот параметр отключен, в оконном режиме сеанс отображается на тех же дисплеях, что и в полноэкранном режиме. Этот параметр доступен только в режимах All displays (Все дисплеи) и Select displays (Выбранные дисплеи) и отключен в других случаях.
- Параметр Start in full screen (Запуск в полноэкранном режиме) позволяет указать, будет ли сеанс запускаться в полноэкранном или оконном режиме. Этот параметр доступен только в режиме Single display (Один дисплей) и включен в других случаях.
- Параметр Fit session to window (Сеанс по размеру окна) определяет способ отображения сеанса, когда разрешение удаленного рабочего стола отличается от размера локального окна. Если этот параметр включен, то содержимое сеанса будет умещаться в окне, сохраняя пропорции окна сеанса. Если этот параметр отключен и разрешение и размер окна не совпадают, то будут отображены полосы прокрутки или черные области. Этот параметр доступен во всех режимах.
- Update the resolution on resize (Обновление разрешения при изменении размера) автоматически изменяет разрешение удаленного рабочего стола при изменении размера окна сеанса. Если этот параметр отключен, для сеанса всегда сохраняется то разрешение, которое задано в параметре Resolution. Этот параметр доступен только в режиме Single display (Один дисплей) и включен в других случаях.
- Параметр Resolution (Разрешение) позволяет указать разрешение удаленного рабочего стола. Оно будет использоваться на всем протяжении сеанса. Этот параметр доступен только в режиме Single display (Один дисплей) и когда параметр Update the resolution on resize (Обновление разрешения при изменении размера) отключен.
- Параметр Change the size of the text and apps (Изменение размера текста и приложений) указывает размер содержимого сеанса. Этот параметр применяется только при подключении к Windows 8.1 и более поздних версий или Windows Server 2012 R2 и более поздних версий. Этот параметр доступен только в режиме Single display (Один дисплей) и когда параметр Update the resolution on resize (Обновление разрешения при изменении размера) отключен.
Updates for version 10.2.0
Date published: 07/24/2018
- Incorporated updates for GDPR compliance.
- MicrosoftAccount\username@domain is now accepted as a valid username.
- Clipboard sharing has been rewritten to be faster and support more formats.
- Copy and pasting text, images, or files between sessions now bypasses the local machine’s clipboard.
- You can now connect via an RD Gateway server with an untrusted certificate (if you accept the warning prompts).
- Metal hardware acceleration is now used (where supported) to speed up rendering and optimize battery usage.
- When using Metal hardware acceleration, we try to work some magic to make the session graphics appear sharper.
- Got rid of some instances where windows would hang around after being closed.
- Fixed bugs that were preventing the launch of RemoteApp programs in some scenarios.
- Fixed an RD Gateway channel synchronization error that was resulting in 0x204 errors.
- The mouse cursor shape now updates correctly when moving out of a session or RemoteApp window.
- Fixed a folder redirection bug that was causing data loss when copy and pasting folders.
- Fixed a folder redirection issue that caused incorrect reporting of folder sizes.
- Fixed a regression that was preventing logging into an Azure AD-joined machine using a local account.
- Fixed bugs that were causing the session window contents to be clipped.
- Added support for RD endpoint certificates that contain elliptic-curve asymmetric keys.
- Fixed a bug that was preventing the download of managed resources in some scenarios.
- Addressed a clipping issue with the pinned connection center.
- Fixed the checkboxes in the Display tab of the Add a Desktop window to work better together.
- Aspect ratio locking is now disabled when dynamic display change is in effect.
- Addressed compatibility issues with F5 infrastructure.
- Updated handling of blank passwords to ensure the correct messages are shown at connect-time.
- Fixed mouse scrolling compatibility issues with MapInfra Pro.
- Fixed some alignment issues in the Connection Center when running on Mojave.
Jump Desktop
Jump Desktop is easily one of the slickest and easiest to use remote desktop solutions for Mac users with a dedicated Mac client.
Remote networking can be a complicated affair but it’s clear the developer has gone to a lot of effort to make remote desktop connections easy enough for anyone to use without sacrificing features and stability.
In fact, Jump Desktop is unique in using your Gmail account to automatically setup and configure a remote connection without any further effort on your part.
Jump Desktop for Mac is multi platform supporting iPad, iPhone, iPod and even Android and can be used for connecting from Mac to Mac too.

Jump Desktop is extremely easy to use and doesn’t require networking knowledge making it ideal for beginners to Remote Desktop software. All you need is a Gmail account to get started:
Alternatively, Manual setup is also available for those that know what they’re doing when it comes to Remote Desktop connections.
One of the smartest things about Jump Desktop is that it can map Mac keyboard shortcuts to make them work on Windows.
You can also copy and paste between macOS and Windows and vice versa which is really helpful if you work on both Mac and Windows constantly.
The full version of Jump Desktop is $14.99 which is a modest one-off price to pay without any other monthly fees.
Pricing: $14.99