Media creation tool для windows 8
Содержание:
- Загрузите и запустите инструмент создания медиа для Windows 10
- What You Will Require?
- Способы обновления Windows 10
- Media Creation Tool
- Как использовать Media Creation Tool для загрузки ISO-файла с новейшей установкой Windows 10
- How To Use Windows 11 Media Creation Tool
- Review servicing approach and policies
- How to use Media Creation Tool
- How to Upgrade or Get Windows 10 without Installation
- Use Windows Media Creation Tool to Upgrade Your PC
- What Is Windows 11 Media Creation Tool
- Новая материнская плата? Потеря Windows
- What is Media Creation Tool?
- Create Installation Media For Another PC Option
- WinSetupFromUSB
- End-user readiness
- Выводы статьи
Загрузите и запустите инструмент создания медиа для Windows 10
Не имеет значения, хотите ли вы создать установочный носитель самостоятельно или загрузить файл ISO с последней версией Windows 10. Для обеих задач вам понадобится Media Creation Tool — небольшой исполняемый файл, предлагаемый Microsoft, который позволяет вам загрузить Windows 10 и создайте установочный носитель или напрямую обновите текущий компьютер или устройство до последней версии.
Чтобы получить Media Creation Tool, запустите ваш любимый веб-браузер и перейдите к загрузке Windows 10. Прокрутите, пока не найдете кнопку «Загрузить инструмент сейчас» и нажмите или нажмите на нее. В разделе говорится: «Создайте установочный носитель Windows 10».
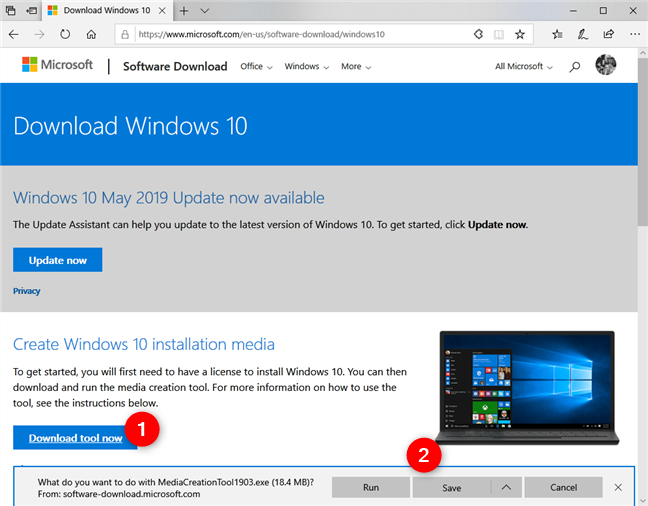
Microsoft просит загрузить исполняемый файл MediaCreationTool , размер которого составляет 18,3 МБ. Имя файла оканчивается номером версии 1903, который говорит о том, что вы получаете Windows 10 с майским обновлением 2019 года.

Сохраните его где-нибудь на вашем компьютере, а затем запустите файл. В зависимости от того, что вы хотите сделать, прочитайте следующий раздел этого учебника или следующий за ним.
What You Will Require?
Before we continue with the guide to using Windows 11 Media Creation Tool, let’s discuss a few things that you will need throughout the process. There are certain things that you require to continue with the process of upgrading Windows with the media creation tool.
- Ensure you have a computer to install Windows.
- Take a backup of your data before you continue with the process. In case of data loss, you can easily restore the data if you have a backup of it.
- Ensure you have a stable internet connection. You will need a good speed internet connection to download Windows and then upgrade your Windows or create a bootable USB drive.
- Ensure you have a USB drive with at least 8GB of storage. You will need this if you are not upgrading your Windows but creating a bootable USB drive from the Media Creation tool.
Способы обновления Windows 10
Обновление системы выполняется с помощью нескольких способов:
- Автоматически через Центр обновлений Windows.
- С помощью специальной программы — Помощника по обновлению Windows 10.
- При помощи средства Media Creation Tool.
- Можно выполнить переустановку Виндовс 10 поверх ранее установленной системы.
Несколько разнообразных способов для получения и установки самой последней версии Windows 10 будут полезны в некоторых случаях.
После выхода финального релиза, обновления постепенно начинают отправляться на компьютеры пользователей по всему миру. Естественно, что новая версия операционной системы не сразу дойдет до многих пользователей, а через некоторый период времени. В этом случае, нетерпеливые пользователи могут использовать другой канал для получения обновленной сборки системы.
Бывают случаи, когда обновление заканчивается неудачно, по каким-то внутренним причинам. После этого, Windows 10 автоматически производит откат системы до предыдущей версии ОС.
А как быть, если установить вышедшую версию Windows 10 все равно желательно? Выходом из этого положения, станет использование другого способа для получения и установки обновления системы.
В данной статье, мы рассмотрим использование программы Media Creation Tool для выполнения обновления Windows 10 до последней из вышедших версий.
Утилита Media Creation Tool разработана корпорацией . Приложение не требуется устанавливать на компьютер, оно работает на русском языке. Для запуска средства, достаточно кликнуть два раза левой кнопкой мыши по исполняемому файлу.
Сначала необходимо скачать приложение Media Creation Tool с официального сайта загрузок Microsoft. На сайте: https://www.microsoft.com/ru-ru/software-download/windows10 под вопросом «Хотите установить Windows 10 на своем компьютере?», нажмите на кнопку «Скачать средство сейчас».
Media Creation Tool
Создание загрузочной флешки с Windows 10 с помощью официального средства от Microsoft — Media Creation Tool. Это самый простой и самый надёжный способ, у нас с ним никогда не было никаких проблем. Приступим!
Во избежание прохождения процедуры заново, сразупопрошу обратить внимание на 6 и 7 пункты!
Потраченное время: 1ч. 40мин. Я подключал флешку в USB 2.0, пользовался не очень быстрым интернетом и скачивал сразу две архитектуры. Скорее всего, воткнув флешку в USB 3.0 и выбрав одну архитектуру (пункт 5) можно уменьшить время до 30-40 минут.
Ссылка/Link: https://www.microsoft.com/ru-ru/software-download/windows10
Или воспользуйтесь прямой ссылкой -> Скачать Media Creation Tool
Рис.1 — Скачиваем Media Creation Tool
2 — Запускаем скачанный исполняемый файл — MediaCreationTool.exe, нас поприветствует надпись Windows и начнётся Подготовка к созданию образа.(Рис.2)
Рис.2 — Подготовка при запуске, Media Creation Tool
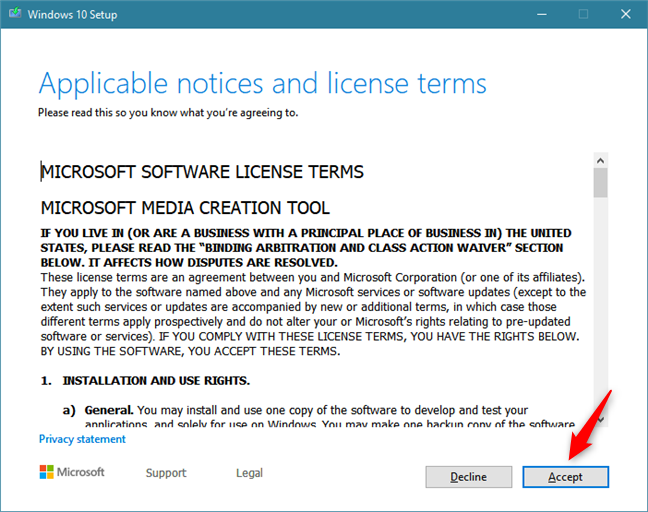
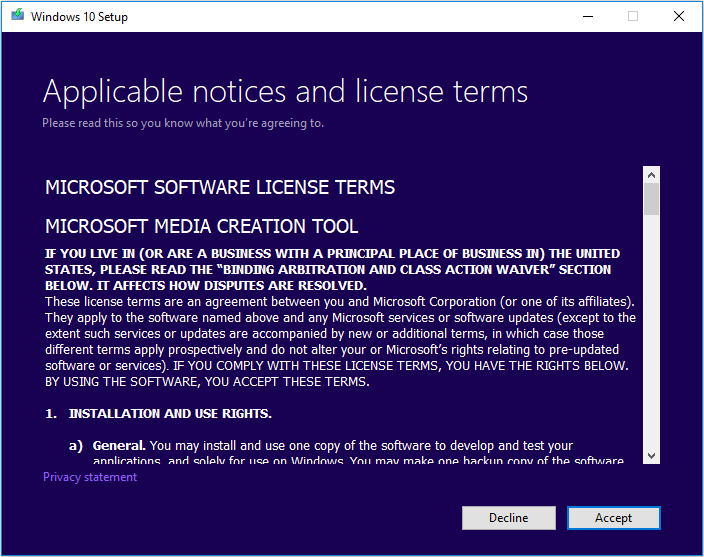
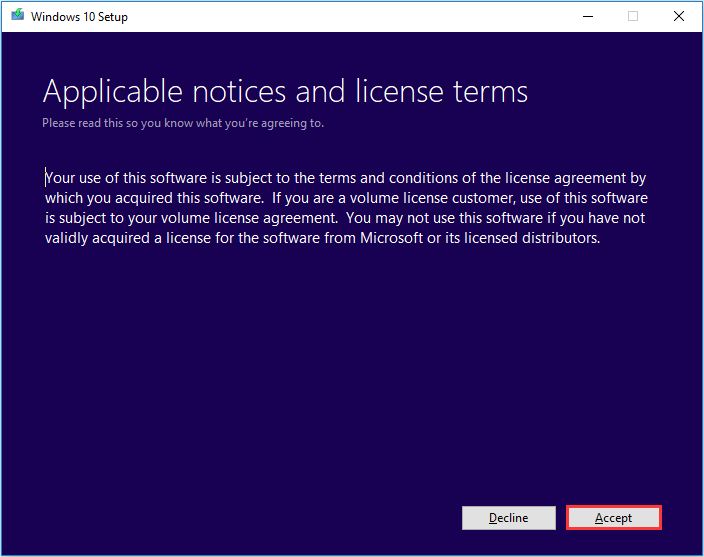
3 — Читаем условия лицензии, чтобы знать на что мы соглашаемся, и жмём «Принять».(Рис.3)
Рис.3 — Применимые уведомления и условия лицензий в Media Creation Tool
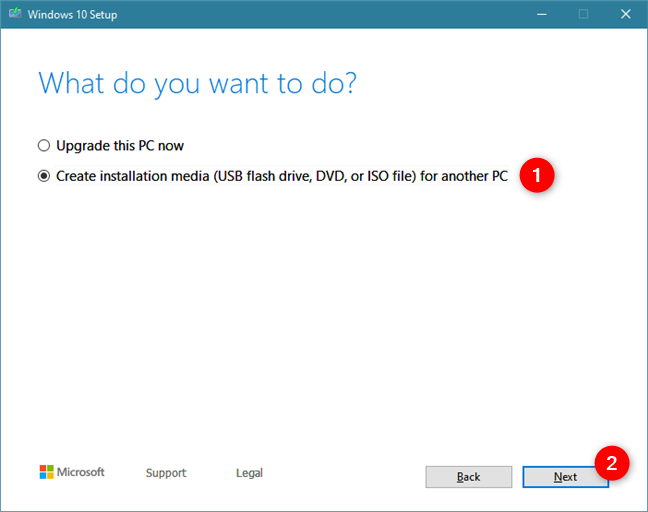
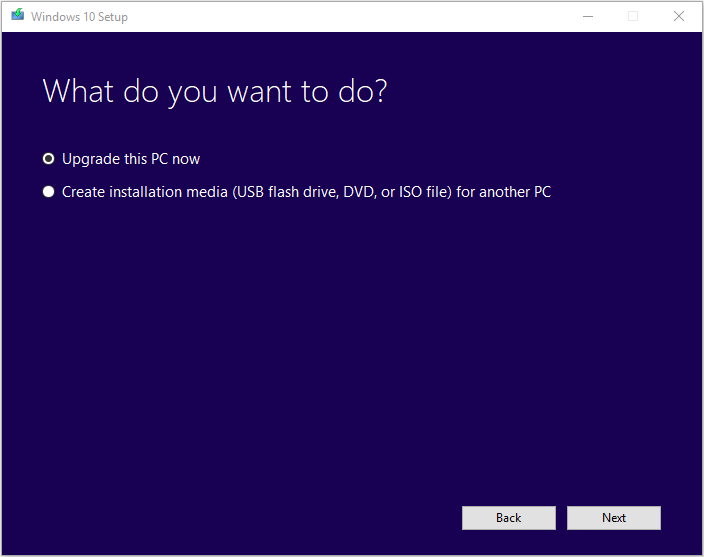
4 — Далее нам предлагается выбрать что мы хотим сделать «Обновить этот компьютер сейчас» или «Создать установочный носитель (USB-устройство флэш-памяти, DVD-диск или ISO-файл)», выбираем второе.(Рис.4)
Рис.4 — Выбор действий в Media Creation Tool
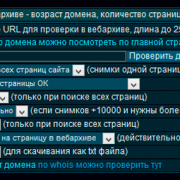
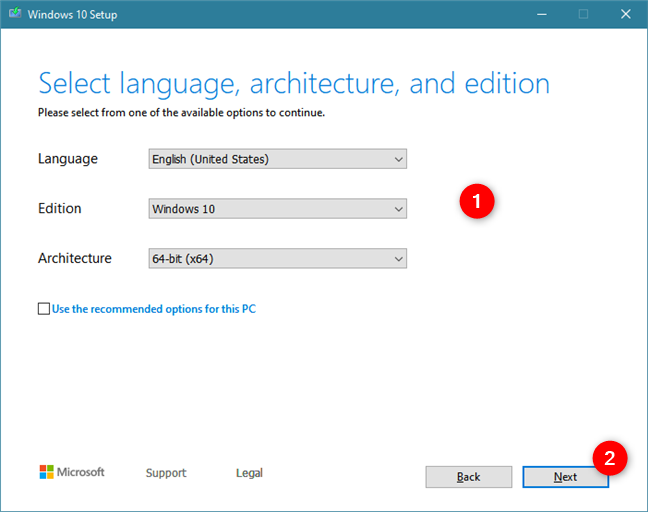
5 — Выбираем язык, архитектуру и выпуск. По умолчанию стоит галочка «Использовать рекомендуемые параметры», здесь автоматически подобраны язык и архитектура для компьютера, на котором запущена это программа.(Рис. 5) Снятие этой галочки, делает доступным выбор параметров вручную. Доступно множество языков и три выбора архитектуры: «x32», «x64», и «Оба». Лично мне не помешает x32 и x64 на одной флешке, следовательно я выбираю «Оба» и жму «Далее».(Рис.5.1)
Рис. 5 — Выбор языка, архитектуры и выпуска, рекомендуемые параметрыРис. 5.1 — Выбор языка, архитектуры и выпуска вручную
6 — Выскакивает окно с предупреждением, о том что если выпуск на установочном носителе не соответствует выпуску Windows на компьютере, на котором вы будете его использовать, то потребуется ключ продукта для установки Windows.(Рис.6) Если вы переустанавливаете свою Windows 10 на новую чистенькую Windows 10 то при выборе правильной архитектуры ключ просить не должно.
Рис.6 — Предупреждение и необходимом соответствии выпусков Windows.
7 — Обратите внимание! Прежде чем записать образ Windows на флешку, Media Creation Tool скачает образ на диск «C», заранее проверьте доступное количество свободного места. Для одной из архитектур «x32» или «x64» потребуется 8Гб свободного места, а при выборе загрузки «Обеих» архитектур потребуется 16Гб свободного места. В противном случае вам покажут такое окно (Рис.7), предложат освободить место и начать все сначала
Рис.7 — Предложение начать все сначала из-за нехватки свободного места
8 — Выбираем в каком виде нам нужен образ «USB-устройство флэш-пямяти» или в виде «ISO-файла». Выбираем первое и жмём «Далее». (Рис.8)
Рис.8 — Выбираем носитель
9 — Выбираем нашу флешку которую хотим сделать загрузочной и жмем «Далее».(Рис.9)
Рис.9 — Выбор USB-устройства
10 — Далее программа начнёт скачивать образ с интернета. Лично у меня это заняло 50 минут. со скоростью интернета в 15Мбит/с. (Рис.10)
Рис.10 — Загрузка образа Windows 10
11 — После загрузки Media Creation Tool автоматически начнёт Создание загрузочного носителя Windows 10. (Рис.10) Эта процедура заняла ещё 40 минут.
Рис.10 — Создание загрузочного носителя Windows 10
12 — Программа оповещает нас о готовности загрузочной флешки.(Рис.11) Жмем «Готово». Мелькнёт окно с процессом удаления ненужных данных, по всей видимости это чистка диска «C» от образов скачанных туда перед созданием загрузочного носителя (Рис.12), и программа сама закроется.
Рис.11 — Загрузочная флешка готоваРис.12 — Удаление ненужных данных перед закрытием.
Всё! Загрузочная флешка у нас готова. Можно вытаскивать и пользоваться по назначению.
Поделиться публикацией
Была ли вам полезна статья? Есть возможность
поддержать проект.
Как использовать Media Creation Tool для загрузки ISO-файла с новейшей установкой Windows 10
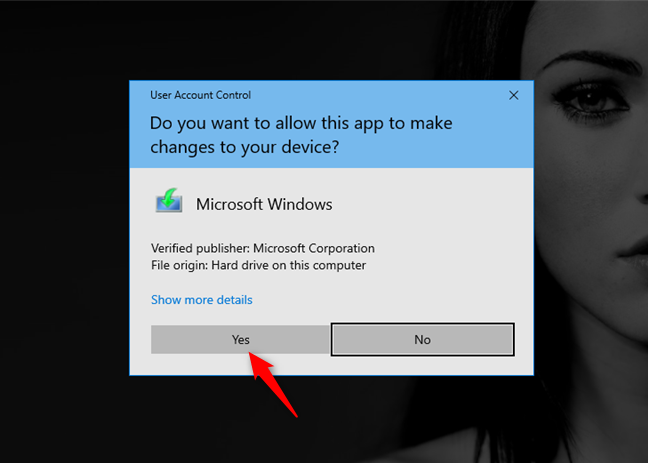
Вы можете использовать Media Creation Tool для создания ISO-образа Windows 10. Начните с запуска файла MediaCreationTool1809.exe, используя учетную запись пользователя с правами администратора. Когда Контроль учетных записей пользователей (UAC) спросит, уверены ли вы, что хотите запустить это приложение, нажмите или коснитесь Да.
Media Creation Tool загружает и просит вас принять его условия лицензии. Нажмите Принять, чтобы продолжить.
Вас спрашивают, что вы хотите сделать. Выберите «Создать установочный носитель (USB-накопитель, DVD или файл ISO) для другого ПК» и нажмите «Далее».
Выберите язык , редакцию и архитектуру, которые вы хотите использовать для установочного файла ISO, который вы собираетесь загрузить. Вы также можете выбрать «Использовать рекомендуемые настройки для этого ПК», что автоматически выбирает язык, редакцию и архитектуру, соответствующие ПК, на котором вы сейчас работаете. Затем нажмите Далее.
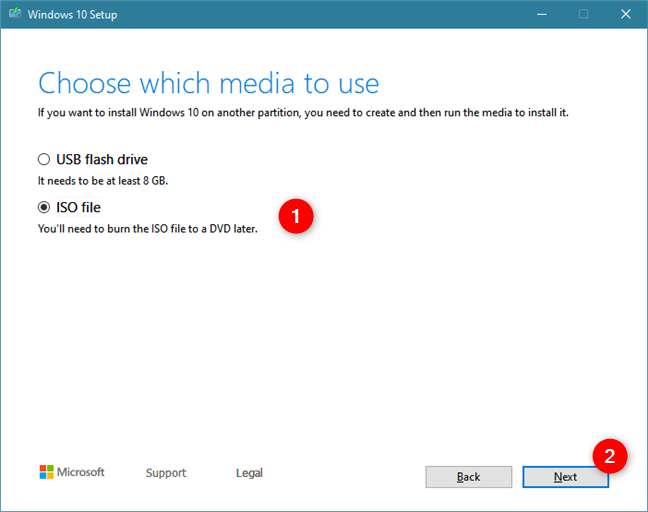
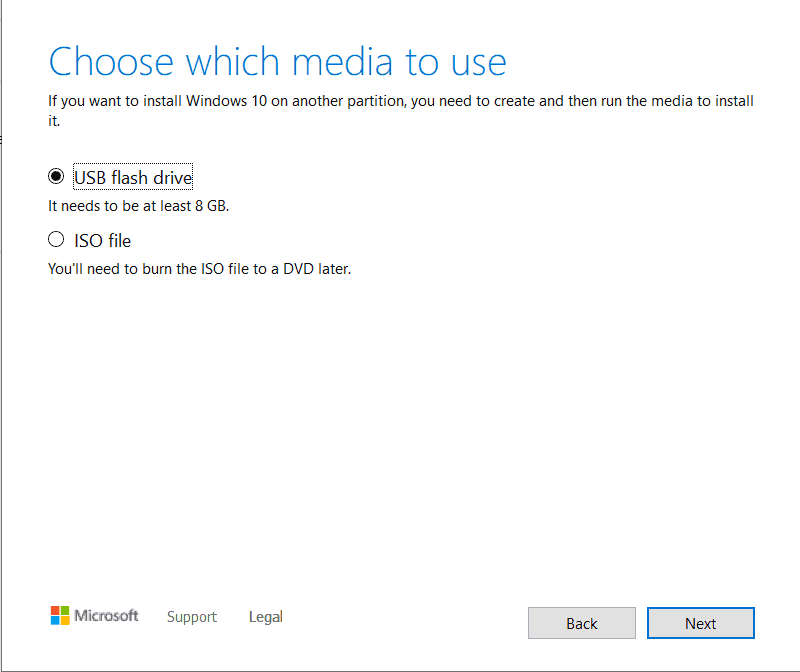
Вас попросят выбрать, какой носитель использовать. Выберите «ISO файл» и нажмите Далее.
Media Creation Tool попросит вас выбрать место, где вы хотите сохранить ISO-файл, и имя, которое вы хотите дать ему. Найдите свой компьютер или устройство, выберите нужное местоположение, выберите имя, а затем нажмите кнопку Сохранить, чтобы начать загрузку файла ISO.

Media Creation Tool начинает загружать последние версии установочных файлов Windows 10 на ваш компьютер или устройство. В зависимости от скорости вашего интернет-соединения и нагрузки на серверы Microsoft, это может занять некоторое время. Подождите пару минут.
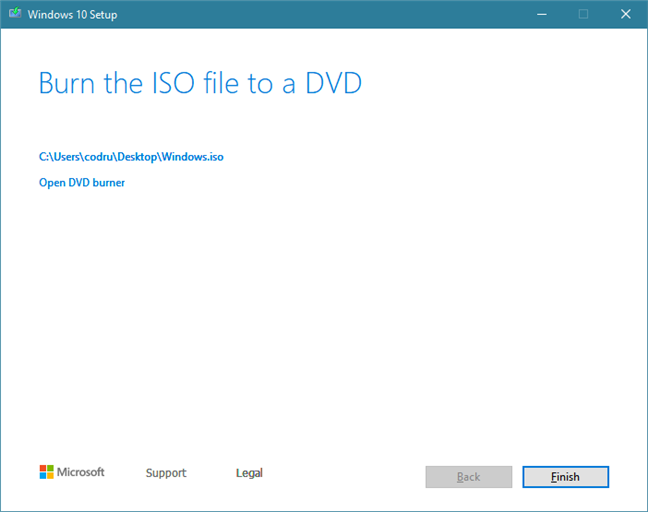
После завершения загрузки проверяется целостность, чтобы убедиться, что все в порядке. Затем файл ISO создается в указанном вами месте. Когда файл создан, вам показывают, где он был сохранен. Нажмите или коснитесь Готово, и затем вы сможете записать ISO-файл на DVD-диск или смонтировать его на виртуальной машине.
How To Use Windows 11 Media Creation Tool
Once you have all the things you require, you can get ahead with upgrading your Windows through the Media Creation Tool. This part of the article will be discussing how you can use Windows 11 media creation tool to upgrade to Windows 11.
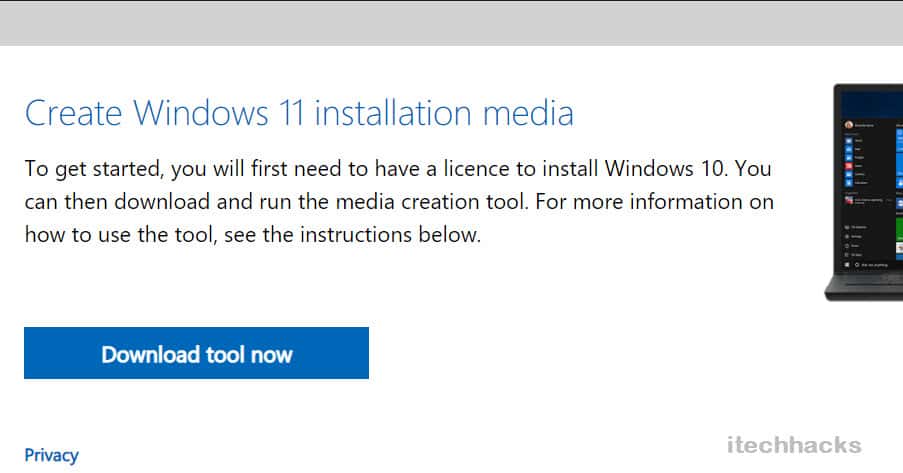
First, click on the link that leads you to the official Microsoft website. Choose “Windows 11“.

Now, There you will get all the information related to Windows 11. Click on “Download Now”
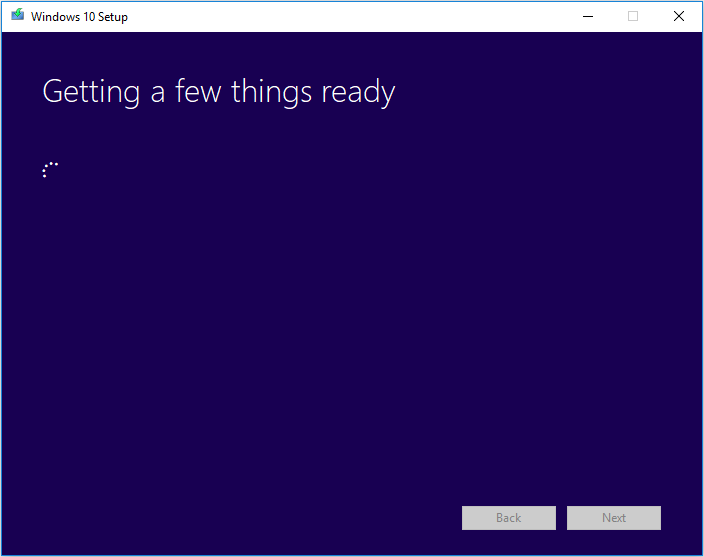
After you have downloaded the media creation tool for Windows 11, run it on your PC. You will be asked to accept the license terms. Once you do that, you will see a screen stating ‘Getting a few things ready.’
Next, you will see two options on the screen – ‘Upgrade this PC now,’ and ‘Create Installation Media (USB flash drive, DVD, or ISO file) for another PC.’

-
- Upgrade this PC- Choose this Option if you want to upgrade the PC on which you are running the Media Creation Tool.
- Create Installation Media for another PC- Select this option, if you want to create a bootable USB drive for another PC.
ALSO READ: How To Make Windows 11 USB Bootable
Review servicing approach and policies
Every organization will transition to Windows 11 at its own pace. Microsoft is committed to supporting you through your migration to Windows 11, whether you are a fast adopter or will make the transition over the coming months or years.
When you think of operating system updates as an ongoing process, you will automatically improve your ability to deploy updates. This approach enables you to stay current with less effort, and less impact on productivity. To begin, think about how you roll out Windows feature updates today: which devices, and at what pace.
Next, craft a deployment plan for Windows 11 that includes deployment groups, rings, users, or devices. There are no absolute rules for exactly how many rings to have for your deployments, but a common structure is:
- Preview (first or canary): Planning and development
- Limited (fast or early adopters): Pilot and validation
- Broad (users or critical): Wide deployment
For detailed information, see Create a deployment plan.
Review policies
Review deployment-related policies, taking into consideration your organization’s security objectives, update compliance deadlines, and device activity. Apply changes where you can gain a clear improvement, particularly with regard to the speed of the update process or security.
Validate apps and infrastructure
To validate that your apps, infrastructure, and deployment processes are ready for Windows 11, join the Windows Insider Program for Business, and opt in to the Release Preview Channel.
If you use Windows Server Update Services, you can deploy directly from the Windows Insider Pre-release category using one of the following processes:
- Set Manage Preview Builds to Release Preview in Windows Update for Business.
- Leverage Azure Virtual Desktop and Azure Marketplace images.
- Download and deploy ISOs from Microsoft’s Windows Insider Program ISO Download page.
Regardless of the method you choose, you have the benefit of free Microsoft support when validating pre-release builds. Free support is available to any commercial customer deploying Windows 10 or Windows 11 Preview Builds, once they become available through the Windows Insider Program.
Analytics and assessment tools
If you use Microsoft Endpoint Manager and have onboarded devices to Endpoint analytics, you will have access to a hardware readiness assessment later this year. This tool enables you to quickly identify which of your managed devices are eligible for the Windows 11 upgrade.
Desktop Analytics does not support Windows 11. You must use Endpoint analytics.
How to use Media Creation Tool
Let’s go through the process of upgrading from Windows 10 Version 1903 to Version 1909 using Windows 10 Media Creation Tool 1909.
2- Running the setup
Once downloaded, run the file MediaCreationTool20h2.exe. This will open a new window which will take some time “Getting a few things ready”.Getting a few things ready
You will need to accept the license terms from Microsoft.Windows 10 Setup terms of use
3- Choose your option
After accepting the license terms, you will be presented with two options:
- Upgrade this PC now
- Create installation media (USB flash drive, DVD, or ISO file) for another PC
Windows 10 Media Creation Tool options
The upgrade option is checked by default. If you want to upgrade your Windows 10 to the latest version, then you should select this option.
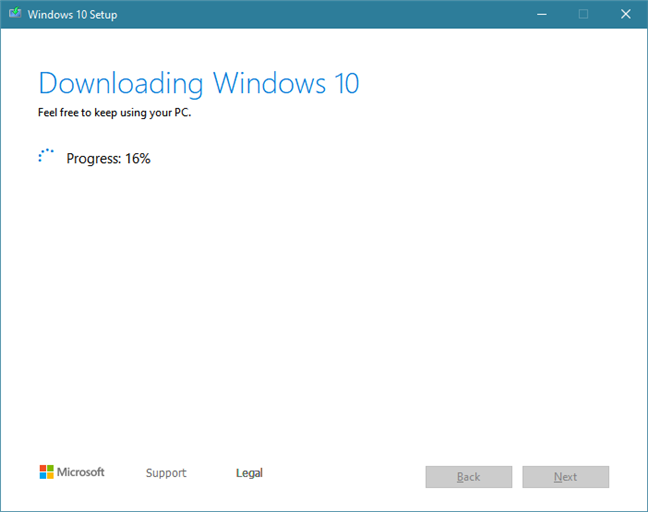
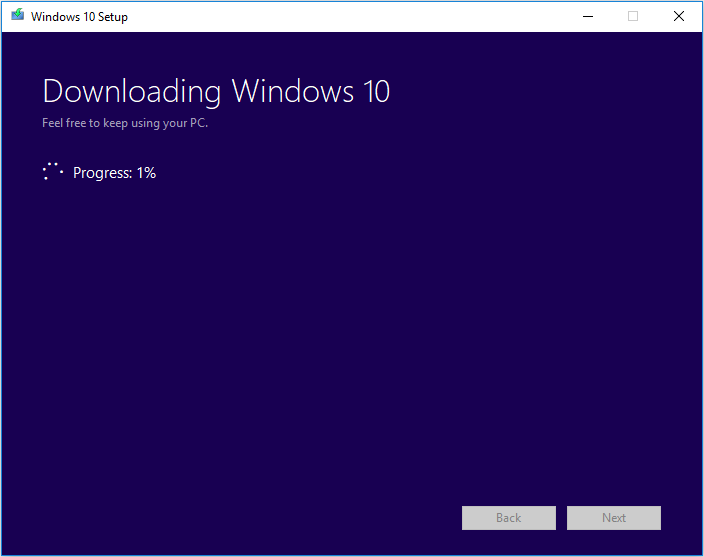
Once you press the Next button while selecting the first option, you will be taken to a new screen which will show you the progress of Windows 10 download from Microsoft servers.Downloading Windows 10
4- Upgrading PC
Once the download is complete, the setup will ask you whether you want to download the latest security updates and install them along with the feature update. You can download the updates now or leave it for later as Windows will automatically download them after installation.
When asked, please select Keep personal files and apps. This makes sure that your files and applications remain safe.
5- Install Windows 10 Version 20H2
Once you hit the Next button, Windows 10 Version 20H2 will start installing. once the installation is complete, you will be required to restart the system. If everything goes well, you can login to the updated version of Windows 10. Otherwise, if the setup fails for any reason, you will revert to the version of Windows which was installed before upgrading.
6- Create installation media
In step no. 3, if you selected the second option then you will be greeted with a similar screen but you will need to select Windows 10 language, edition, and architecture.Select language edition and architecture
Next, you will have two options:
- USB flash drive
- ISO file
Choose which media to use
If you want to directly create a bootable USB drive, then select the first option. You will need USB/DVD storage of at least 8 GB.
If you want to download the ISO file, then select the second option. You can create a bootable USB drive from the ISO using Rufus.
Pressing the Next button will start the download process.
You can also download Windows 10 ISO directly.
How to Upgrade or Get Windows 10 without Installation
After reading the above, some users may find, even Windows Media Creation Tool is easy to use, it will still take you much time to upgrade or install Windows 10. Is there any much simpler way on Windows installation?
Actually, there is a method that can make Windows 10 installation as a breeze — migrate Windows 10 from another healthy PC to your PC with a Windows migration tool. If your friends or family are using the latest Windows 10, you can just use the Windows migration tool to migrate their Windows OS to your PC without reinstallation.
In this way, you do not need to create an installation media with Windows 10 Media Creation Tool and then use it to install Windows 10 as the whole process is time-consuming.
Well then, how to migrate Windows 10 with a reliable Windows migration tool? Here it is recommended to use MiniTool Partition Wizard Pro Ultimate Edition to migrate Windows 10.
MiniTool Partition Wizard is a reliable Windows migration tool as well as a professional partition manager trusted by tens of millions of people. It helps users to repartition hard drive, extend partition, convert FAT to NTFS, check files system, convert MBR to GPT without data loss, wipe disk, copy partition and migrate OS to SSD/HD, etc.
With MiniTool Partition Wizard, you can use Windows 10 operating system without installation.
Step 1. Shut down your computer and take out your system disk. Connect the HDD/SSD to another PC of your family or friends who are using the latest Windows 10 via a SATA-to-USB cable.
Note: If there are important files and data on your system disk, please make a backup as the process will delete all the files on your disk. If it is a brand new disk, then you can go ahead directly.
Step 2. Get the system cloning software to computer by clicking the following button. And run it to get the main interface.
Step 3. Select the function Migrate OS to SSD/HD Wizard on the top toolbar.
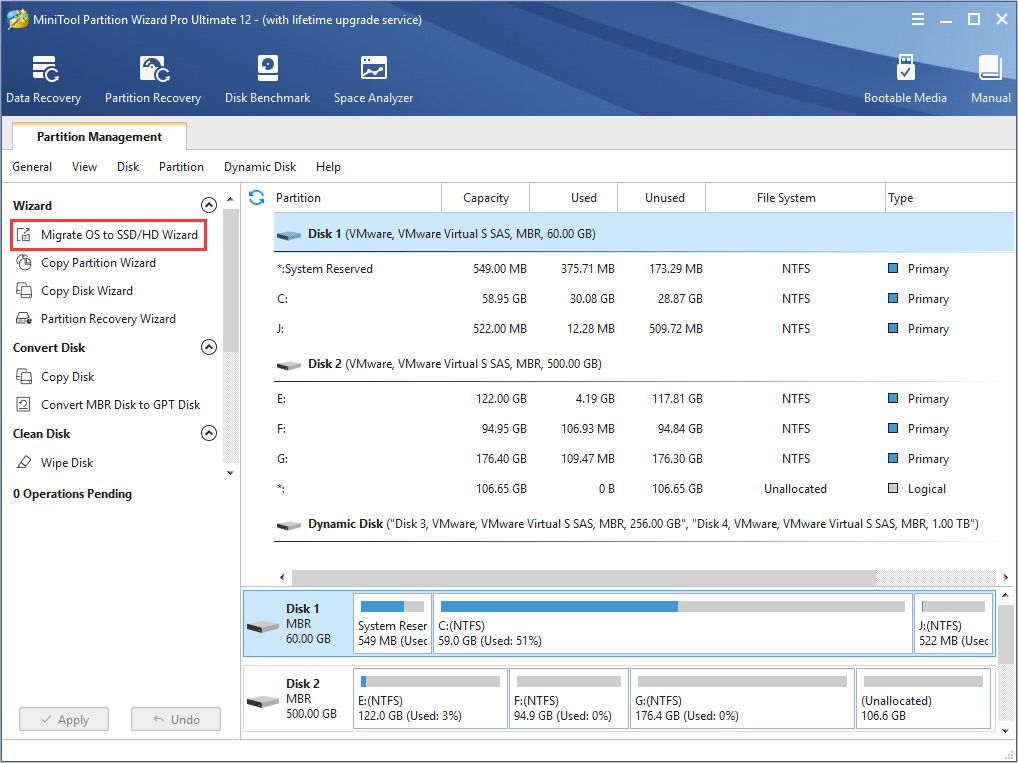
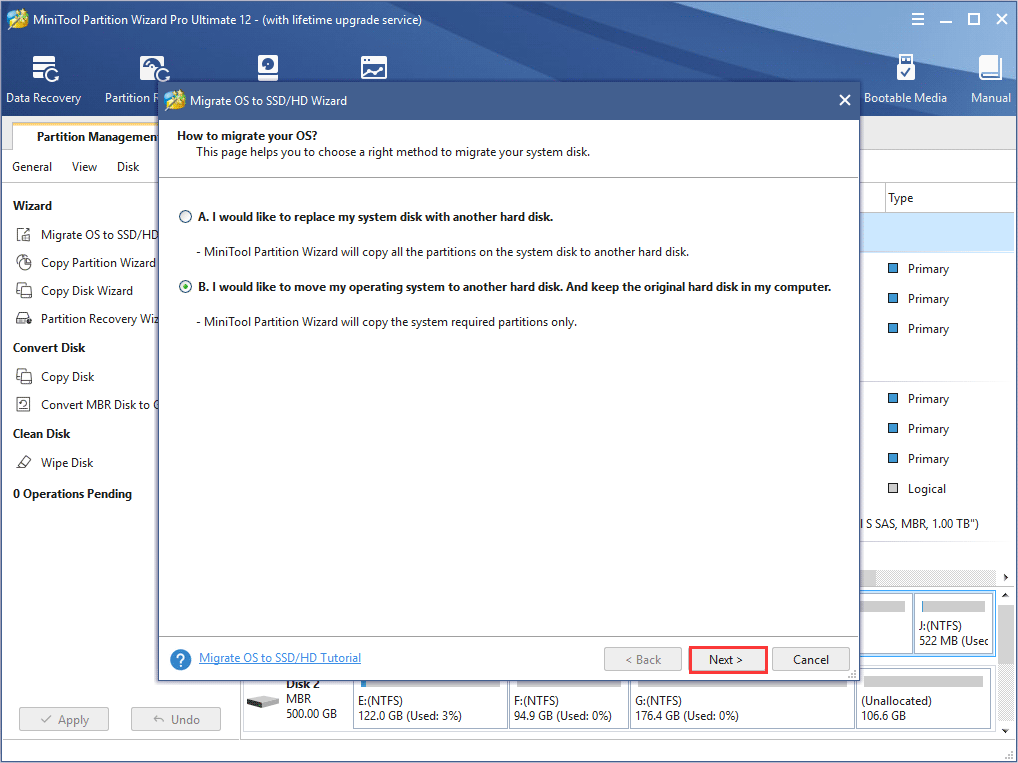
Step 4. Choose option B to move operating system to another hard disk, as the following picture shows.
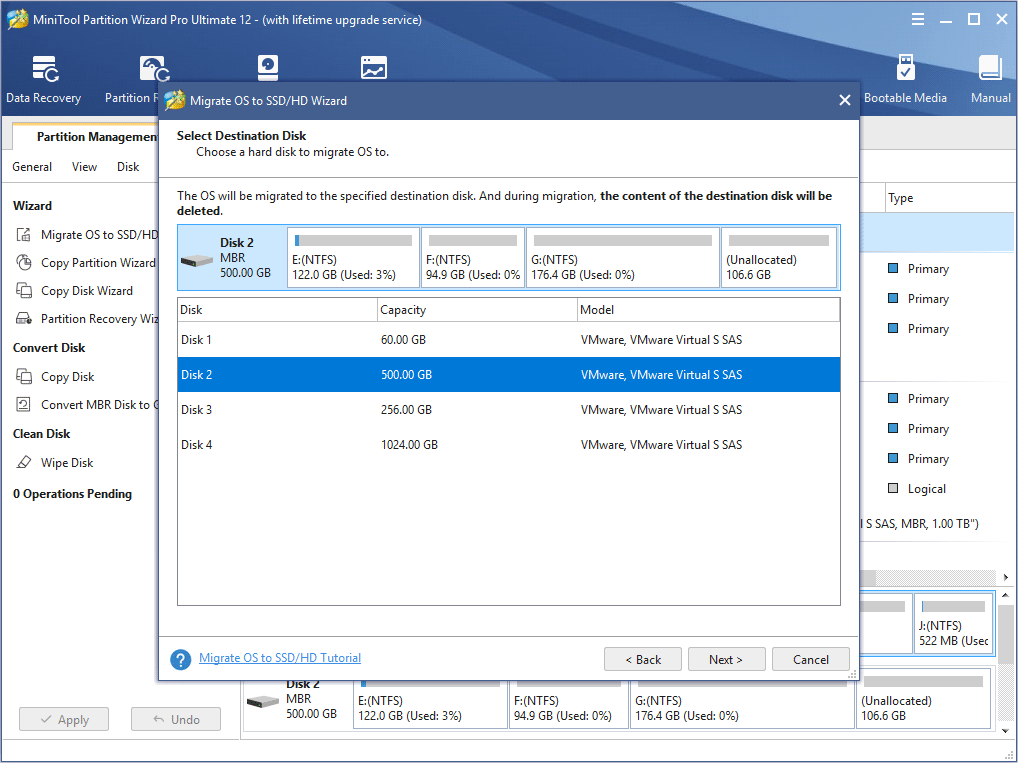
Step 5. Then, choose your HDD/SSD to migrate OS to and click Next.
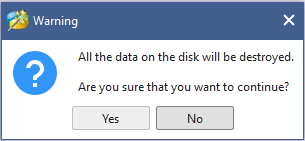
Step 6. All data saved on your HDD/SSD will be destroyed, so please make sure there is no important file and data on the SSD or backup significant ones in advance. Then click Yes on the pop-up Window.
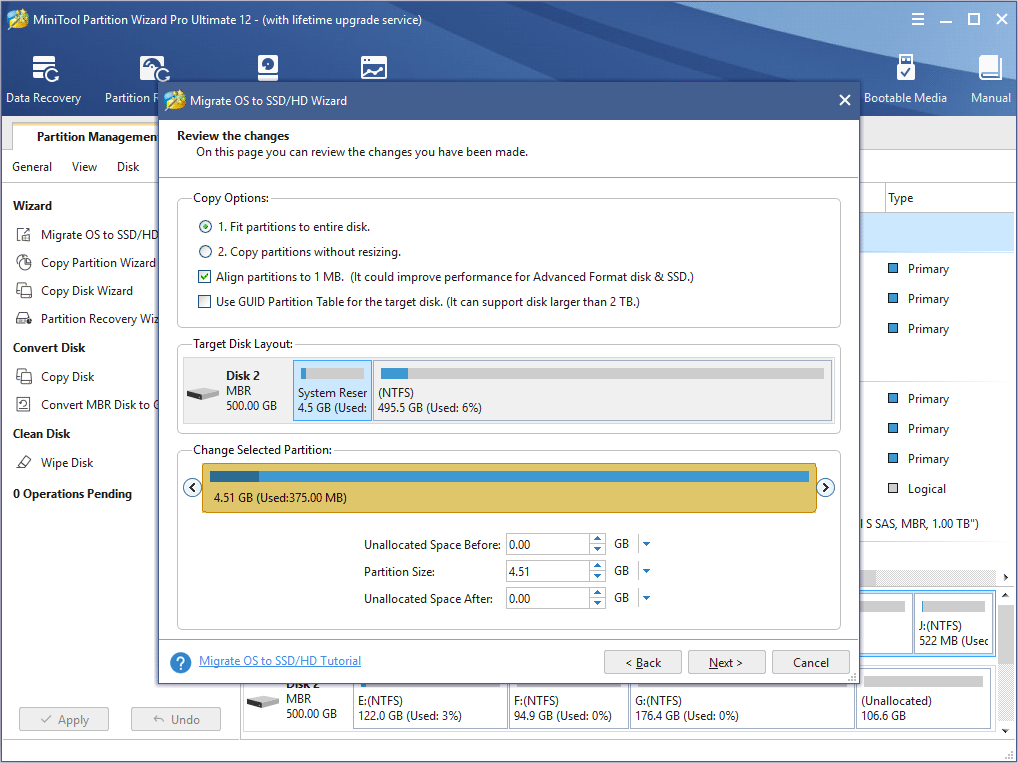
Step 7. Choose a copy method and click Next. If you choose the first one, system partition and boot partition will be enlarged to take up all space of the SSD. If you choose the second one, partitions will be cloned with the same partition size, but you can adjust partition size and location according to actual demands by dragging the handle.
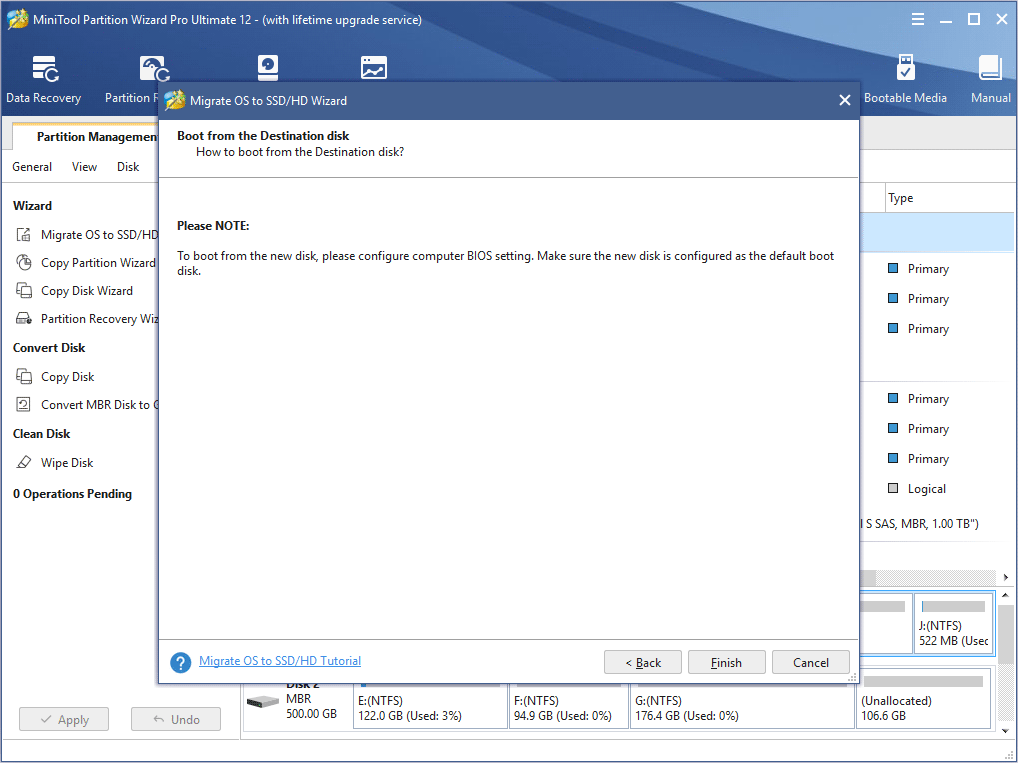
Step 8. This page will remind you to reset BIOS order, giving the new SSD boot priority, so your computer can boot from the new system disk successfully. Then click Finish.
Step 9. At last, please click Apply button on the top to apply all these pending operations.
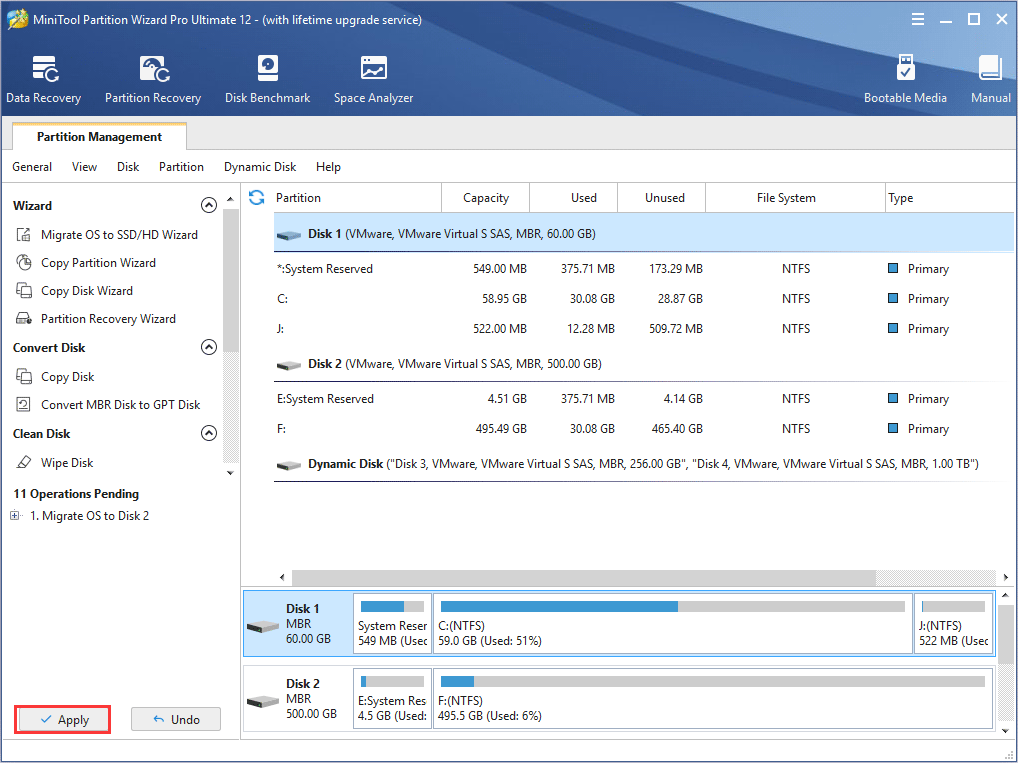
Since the Windows OS is still running, MiniTool Partition Wizard will ask you to restart the computer for data protection.
You see, it is very convenient to migrate OS to another disk with this Windows migration tool. If you find Windows reinstallation is troublesome and time-consuming, you can try using MiniTool Partition Wizard, which can be a big help.
Use Windows Media Creation Tool to Upgrade Your PC
Windows Media Creation Tool is also a Windows upgrade tool as it can upgrade your PC to the latest Windows 10 version. According to many Windows 10 users, using Windows Update to upgrade Windows 10 may encounter some errors like the common Windows 10 update error 0x8007007e, leading to upgrade failure.
In this case, it is highly recommended to utilize Windows 10 Media Creation Tool to upgrade Windows 10. With this Windows upgrade tool, you can quickly upgrade your computer to the latest version of Windows 10. Here are detailed steps and screenshots.
Note: If you intend to upgrade your current computer to Windows 10, make sure it meets the Windows 10 system requirements.
Step 1. Download Windows 10 Media Creation Tool from Microsoft’s official website.
Step 2. Run the Media Creation Tool. To run this tool, you need to be an administrator.
Step 3. On this page, select Accept.
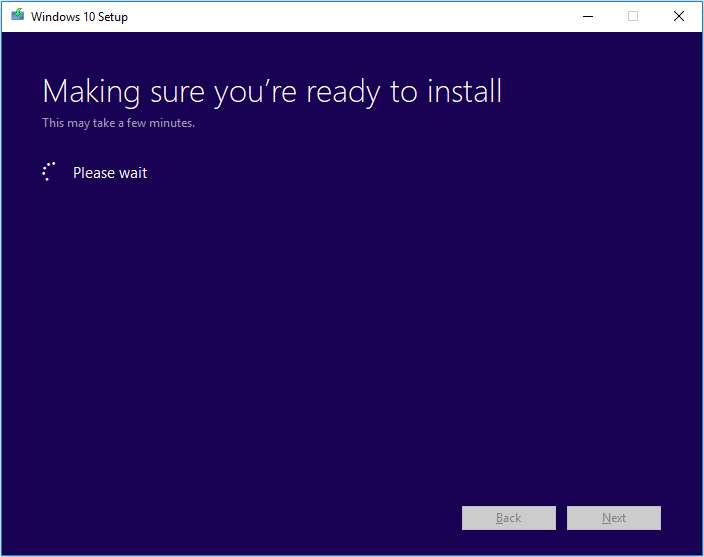
Step 4. Wait patiently for Media Creation Tool to get a few things ready. When it’s done, you can continue.
Step 5. On the What do you want to do page, select Upgrade this PC now, and then click Next.
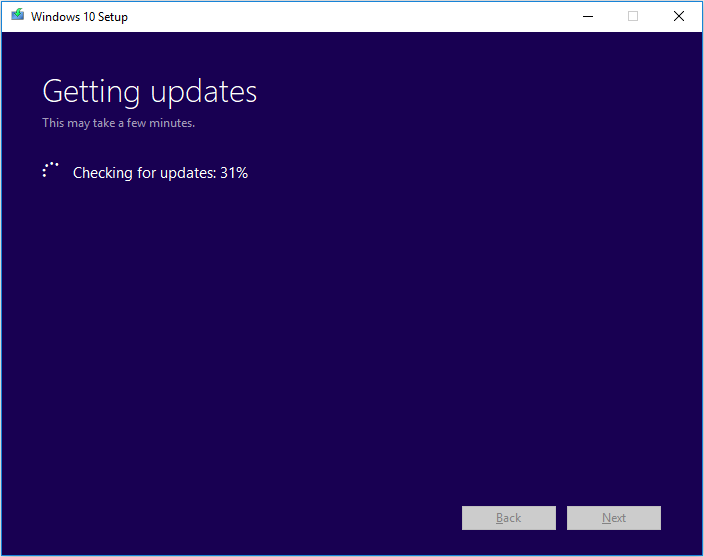
Step 6. At this time, Media Creation Tool will download some files for updates and then check your PC. This process may take some time. Just wait patiently and it won’t be too long.
Step 7. Read the license terms and click Accept.
Step 8. Wait for Media Creation Tool to check for updates.
Step 9. Windows 10 Media Creation Tool will check for your PC again and make sure you are ready to install.
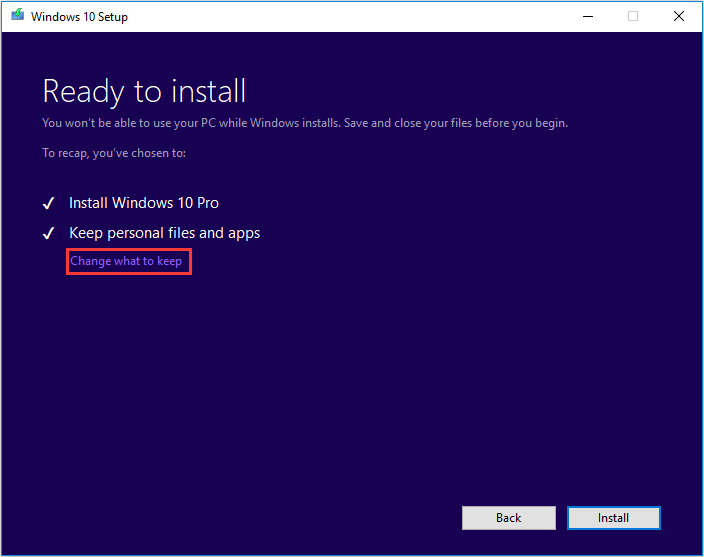
Step 10. When you get this page, you’ll see a recap of what you’ve chosen, and what will be kept through the upgrade. Choose Change what to keep, you can select what to keep by yourself.
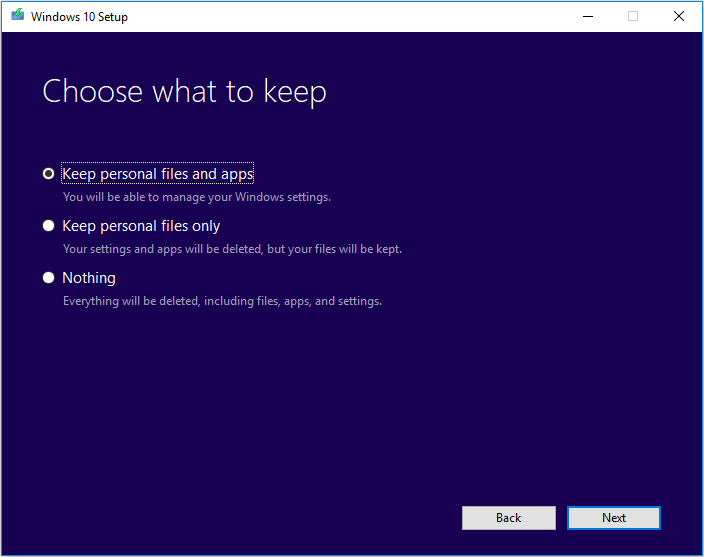
Step 11. Choose whether you would like to Keep personal files and apps, Keep personal files only, or keep Nothing during the upgrade. After selection, then click Next to continue.
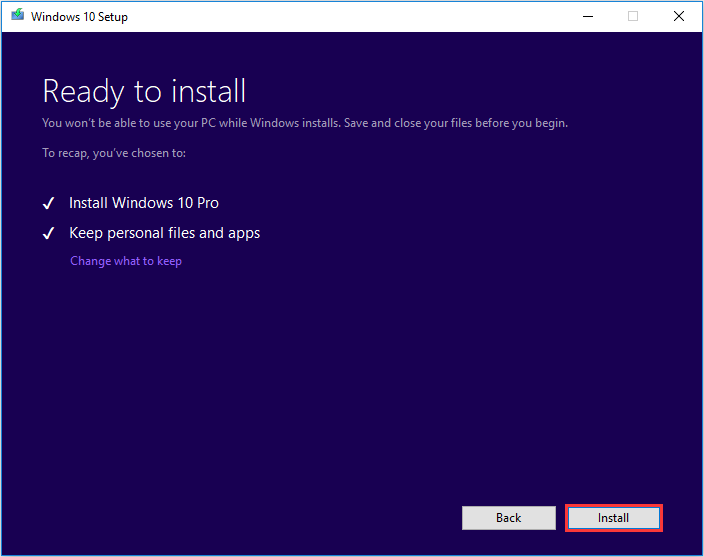
Step 12. Close any running applications and when you’re ready, select Install. During the installation, your PC will restart for a few times. Please don’t turn off your PC.
What Is Windows 11 Media Creation Tool
Microsoft has announced a new version of Windows operating system on June 24, 2021. The Insider Preview build and the leaks online have convinced that many new features and changes are contained in Windows 11. Meanwhile, the main functions, programs, and tools of Windows 10 have also been retained in Windows 11; for instance, the Windows media creation tool. Considering that some users still don’t know much about this tool, I’d like to introduce Windows 11 media creation tool first and then show you how to use media creation tool on Windows 11.
Tip: A lot of MiniTool software is provided for users to protect their data, solve disk and system problems, download/record/convert videos, etc. You’d better get what you need according to the actual needs or get a recovery tool in advance to be well prepared for unexpected data loss.
What Can Windows 11 Media Creation Tool Do
The media creation tool is the only official tool offered by Microsoft for upgrading. Of course, the main and the most important function of media creation tool Windows 11 is to help users update their PC to the latest version of Windows.
The Windows 11 media creation tool offers users 2 choices for upgrading the system:
- Upgrade this PC now
- Create installation media (USB flash drive, DVD or ISO file) for another PC

It means that you can choose to perform the update directly or to create a bootable USB drive/DVD or an ISO file for installing Windows 11 on another computer. Besides, this bootable disk can be used later to reinstall Windows 11 when system crashes.
Новая материнская плата? Потеря Windows
При активации Microsoft сразу связывает лицензию ОС с уникальным кодом различных компонентов вашего ПК, называемым также Product ID. Благодаря этому становятся возможным обновления и возможные переустановки Windows 10 на этом компьютере в будущем. Однако существует риск отказа системы из-за слишком большого количества замененных системных компонентов.
После покупки нового жесткого диска или же обновления BIOS «десятку» придется активировать заново — это мы поняли во время тестирования. Однако все иначе в случае с материнской картой: после замены этого критического компонента Windows 10 больше не может быть активирована на этом компьютере. Необходимо покупать лицензию или же сначала установить старую версию, а уже с нее провести обновление до «десятки».
Этот метод, впрочем, работает только с Retail-вариантами с ключом в комплекте. Если же у вас OEM-версия, а материнская плата от того же производителя, что и ПК и была заменена в рамках ремонта, необходимо к нему же и обратиться. Производитель несет ответственность за восстановление прежнего состояния вашего компьютера.
What is Media Creation Tool?
Windows 10 Media Creation tool has two functions:
- Upgrade the PC which has already installed Windows 10
- Create installation media (USB flash drive, DVD) for another PC or simply download the latest Windows 10 ISO file.
Windows Update Assistant is another tool which can be used to upgrade the PC seamlessly but I prefer the media creation tool. If you want to upgrade your PC to the latest version of Windows 10, you should select the first option. And if you want to create a bootable USB/DVD, then you should select the second option.
The only problem with the Media Creation Tool is that it will try to download the Windows 10 setup every time you want to create a bootable USB/DVD. This is the default behavior.
Create Installation Media For Another PC Option
If you select ‘Create installation media for another PC option’, then follow the steps given below-
When you select the option, you will be asked to select the language, edition, and architecture of the Windows you want to install. You can click ‘Use the recommended options for this PC,’ if you want the Media creation tool to automatically select the options for the machine. Once done, click on next.

-
Next, you will see two options on the window- ‘USB flash drive,’ and ‘ISO file.’
- USB flash drive- If you select this option, the Windows media creation tool will create a bootable USB drive for you.
- ISO file- If you select this option, the media creation tool will download the ISO file. You will be able to burn the ISO file later to create a bootable USB drive or a DVD.
- If you select the ‘USB flash drive’ option, ensure you connect a USB drive that is at least 8GB in storage. The media creation tool will begin downloading the Windows 11 and will burn it to the USB flash drive automatically.
- If you select the ‘ISO file’ option, the ISO file of Windows 11 will be downloaded. You can later burn it with the help of burning tools like Power ISO. You can use such tools to burn the ISO file to a USB drive.
- Once you have created the bootable USB drive of Windows 11, plug the USB drive into the computer which you want to upgrade to Windows 11.
- After plugging in the USB drive, boot into BIOS and install the Windows.
ALSO READ: How to Upgrade Windows 10 to Windows 11
WinSetupFromUSB
Скачиваем здесь WinSetupFromUSB, распаковываем, открываем.
- В верхнем поле указываем флешку, на которую будем сохранять нашу Windows 10.
- Сразу чуть ниже устанавливаем флажок «Autoformat it with FBinst»
- Ставим галочку напротив «Windows Vista / 7 / 8 ….» (не волнуйтесь, для десятки всё тоже подходит) / Открываем квадратную кнопку многоточием справа / Находим на компьютере файл ISO с нашей копией / Жмем «Открыть».
- Большой кнопкой «GO» внизу запускаем процесс записи образа.
- Подтверждаем, что мы не против очистки флешки. Добросовестная программа переспрашивает это два раза разными словами, так что жмем «Да» и потом снова«Да» .
- Начинается запись, по окончании и появлении фразы «Job done» нажимаем ОК. Принимаем работу!
End-user readiness
Do not overlook the importance of end-user readiness to deliver an effective, enterprise-wide deployment of Windows 11. Windows 11 has a familiar design, but your users will see several enhancements to the overall user interface. They will also need to adapt to changes in menus and settings pages. Therefore, consider the following tasks to prepare users and your IT support staff Windows 11:
- Create a communications schedule to ensure that you provide the right message at the right time to the right groups of users, based on when they will see the changes.
- Draft concise emails that inform users of what changes they can expect to see. Offer tips on how to use or customize their experience. Include information about support and help desk options.
- Update help desk manuals with screenshots of the new user interface, the out-of-box experience for new devices, and the upgrade experience for existing devices.
Выводы статьи
В бесплатной программе Media Creation Tool можно выполнить обновление Windows 10 до новой версии системы. Программа выполнит все необходимые операции, в итоге, на компьютере будет установлена самая последняя версия Windows 10. При настройках по умолчанию, в обновленной версии системы будут сохранены все данные пользователя и установленные программы.
Обновление Windows 10 в Media Creation Tool (видео)
Похожие публикации:
- Сравнение версий Windows 10: таблица
- Как отключить или удалить OneDrive в Windows 10
- Диск восстановления Windows 10
- Как установить русский язык в Windows 10 — 2 способа
- Индекс производительности Windows 10 — 5 способов