Как установить adb (android debug bridge) в windows 10
Содержание:
- How to Install ADB on Windows?
- Requirements
- ADB не видит телефон
- Step by step instructions to Install APK Using ADB Commands
- How to Setup ADB/Fastboot on Windows
- Случаи, когда отладка спасает
- Как пользоваться ADB
- Install ADB on macOS
- Method to Fix “adb not recognized” Error
- Part 2. Enable USB Debugging on Your Mobile Phone
- How to Install ADB Drivers of Android device:
- What is ADB
- Install ADB on Windows
- Install ADB and Fastboot Drivers
- How to Install ADB on Linux OS
- How to Setup ADB (Android Debug Bridge)
- Проблемы EasyTether: невозможно подключиться по ADB
- Download Google USB Drivers
How to Install ADB on Windows?
- Open the SDKManager.Exe and choose only the “Android SDK Platform Tools” for installation. If you’re on a Nexus phone, you should also choose “Google USB Driver”. When you click Install, it will begin downloading the necessary files to your computer.
- Enable USB debugging on your device. ADB will only work on your device when USB debugging is enabled. USB debugging is usually found under Developer Options, so if you have not enabled Developer Options yet, go to Settings>About Phone> tap on “Build Number” 7 times, and you will get an alert that Developer Options are enabled. You can now go into the Developer Options to turn on USB Debugging.
- Navigate to the folder on your PC where the SDK tools were installed. Shift + Right Click on the folder and select “Open Command Window Here”.
-
Connect your Android phone to your computer via USB (Make sure that you are using Data cable, not the charging cable). If you are prompted on your device, then choose “file transfer (MTP)” mode. Now in the command terminal type:
adb devices
 List of Attached Devices
It should display your device as being connected. If there is no device shown in the command prompt, you may need to download USB drivers specific to your phone from the manufacturer’s website.
You should now configure your system-path so you can always run ADB commands from inside the command terminal without having to run it from the SDK tools folder. The methods are nearly the same but a little different between Windows 7, 8, and 10.
Requirements
Users should keep the following prerequisites in their mind. If the following conditions are not met, the sideloading process can be disturbed which in turn, can leave your device in Bootloop.
- Charge your device at least 60% before starting the process.
- Backup your entire device just in case it needs to be formatted.
- on your computer from their official website.
- from the Developer Options. (Guide to Enable Developer Options Under 1 Minute)
- Download USB drivers for your device. (Search for “Device brand” + “USB Drivers” on Google)
- Move the ZIP file that you want to sideload in the same folder as the ADB drivers.
ADB не видит телефон
Если вы соединили USB кабелем компьютер и
устройство Андроид, но команда «adb devices» не показывает (не видит)
подключенное устройство, то самые частые причины:
- На устройстве (смартфон, планшет) не включена опция «Отладка по USB«.
- На устройстве (смартфон, планшет) не подтвержден запрос на
подключение с компьютера. Подробнее выше, в разделе «Как пользоваться ADB». - Используется поврежденный USB кабель или
кабель без сигнальной линии. Кабели на некоторых зарядных устройствах не
имеют сигнальной линии. - Устройство (смартфон, планшет) не может работать через стандартный
драйвер ADB.
Step by step instructions to Install APK Using ADB Commands
Other than sideloading APK on Android gadgets, you can likewise install APK utilizing ADB commands.
Usually, people install apps from the Google Play Store on to their Android gadgets or installing applications by signing into their Play Store on the PC and introducing Standalone applications from the SD card by authorizing the Unknown Sources choice in the device settings.
Most
of the Android users can be grouped into this class since it is the basic
method to install applications. Imagine a scenario where the UI of your gadget
crashed and you can’t get to any applications on your gadget.
Therefore, to get into the device installation(ADB install apk) of third-party applications is required, you need to download the launcher application APK on your PC. If the Google Play Services has crashed (this normally happens when you attempt to mod your gadget), you can’t download the application from Play Store by any means.
All things considered, the ADB acts as the hero. ADB is the abbreviation for Android Device Bridge which acts as a link between your PC and Android gadget. You can download applications through these ADB tools, however, it isn’t just limited to installations, the applications of ADB devices are far more and are irrespective of one’s knowledge about Android, people will learn about its significance.
Don’t Miss: ADB Sideload apk
Pre-Requisites
- Proper Device drivers should be installed
- Either set-up ADB and Fastboot on your PC, or download the ADB and Fastboot SDK Platform-Tools.
- Enable USB Debugging on your gadget.
How to Setup ADB/Fastboot on Windows
I. Download and Install ADB & Fastboot
So, back in the day, you would need to download the entire Android SDK to get ADB and Fastboot to work, but thanks to some clever developers out there, you can get away with just downloading minimal versions that only setup ADB and Fastboot and leave the rest of the SDK out, for, you know, real developers.
1. Head to this developer’s page on XDA and download the 15 Second ADB Installer (download link in the first post, download whichever one he says is stable).
2. Right click the exe that downloads and select Run As Administrator.
3. When it opens, hit y and enter for each of the questions as it guides you through. (This will install ADB system wide so any user of the computer can access it and also install the drivers, which is a huge help as it can be the hardest part of all this to get to work).
4. When it’s all done, restart the computer to ensure they were installed.
5. On your phone, go to Settings > About Phone and continually tap on Build Number until it tells you you are a developer.
6. Hit Back.
7. Go to Developer Options and turn on USB Debugging.
8. Plug your device in via USB cable and wait for it to install drivers.
9. Now, on the PC, Open File Explorer and head to C: then adb and hold shift on your keyboard and right-click in a blank spot anywhere inside the folder (inside that folder you should see adb and fastboot along with a couple other files) and select Open Command Window Here.
10. Type the following into the command prompt window (hitting enter at the end of every line):
adb devices
11. If it’s a newer Android phone, a popup asking to allow the RSA keys will show up. Check Always Allow and accept it.
After that, you should see a serial number pop up, it’s the serial number of your phone. This means you are all set!
If you do not see a serial number, then we need to reinstall the drivers manually in Section II below.
II. Troubleshooting Driver Issues
Sometimes the drivers don’t install correctly and need a little coaxing to get them to work properly. Here’s common ways to do that.
Manually Tell Windows About the Drivers
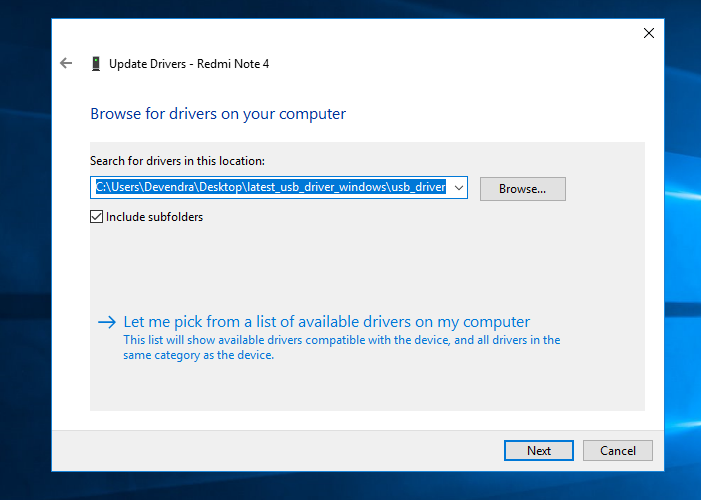
1. On your computer, use the search feature (either using the search charm on Windows 8 or the search bar at the bottom of the screen in Windows 10) and search for Device Manager and then open it.
2. In the device manager. you should see an exclamation point on an item (this indicates that the drivers didn’t install for that item). Right-click that item and select Update Driver Software
3. Then select “Browse My Computer…”
4. Then select “Let Me Pick from a List…”
5. Select Android Device > Android ADB Device.
Now, unplug and plug the device back in and run the adb devices command from step 13 above and see if you get a serial number this time. If so, you are all set.
Случаи, когда отладка спасает
У любого пользователя Android случаются ситуации, когда отладка необходима позарез. Хорошо, что вы воспользовались инструкцией из прошлого раздела и активировали её. Теперь вы сможете:
- Получить на своём смартфоне/планшете рут-доступ с помощью специальных приложений для компьютера. Для этого включенная отладка необходима.
- Извлечь данные из устройства, у которого не работает дисплей. Этой проблеме мы посвящали отдельную статью.
- Восстановить устройство, если оно не загружается. Для этого надо воспользоваться специальными утилитами, которые для разных устройств и чипсетов могут отличаться. Ищите более подробную информацию конкретно о своей модели.
- Работать с командной строкой на компьютере, чтобы быстро скопировать файлы, установить приложение или сразу целый набор приложений, изменить права доступа к тому или иному файлу. Для этого на компьютере должна быть установлена программа ADB (Android Debug Bridge), позволяющая отдавать команды Android-среде на подключенном устройстве. Для неё существует как графический интерфейс, так и набор консольных команд, которые отдаются через командную строку.
В общем, если вы хотите извлечь максимум из функциональности своего Android-планшета или смартфона, режим отладки вам будет исключительно полезен.
Отладка по USB (USB Debugging)
— функция, предоставляющая широкие полномочия десктопным программам, и через нее они глубоко влияют на операционку Android. Перевод аппарата в данный режим актуален, по большей части, для разработчиков
Однако иногда это требуется и пользователям, чтобы справиться с системными неполадками и, что важно, — перенести файлы, папки из устройства с поврежденным дисплеем. Также появляется возможность восстанавливать удаленные документы, создавать бэкапы и др. Изначально USB Debugging выключен, но это не мешает, так как включить отладку по USB на Андроид несложно
Изначально USB Debugging выключен, но это не мешает, так как включить отладку по USB на Андроид несложно.
Отметим, что пути ее активации отличаются в зависимости от производителя устройства, однако суть всегда остается одинаковой: сначала идет разблокировка функционала «Для разработчиков», а затем все остальное.
Внимание! Иногда режим «Для разработчиков»
с самого начала активен, поэтому перед выполнением инструкции проверьте, есть ли он в настройках (можете воспользоваться для этого поиском по настройкам).
Мы приведем инструкции для включения отладки на разных девайсах, а также расскажем, что делать, если телефон не включается , а отладку нужно активировать.
Как пользоваться ADB
Когда вы в первый раз будете подключаться к устройству, на котором включена
опция «Отладка по USB«, на этом устройстве
будет запрос на разрешение подключения, с указанием цифровой подписи
компьютера (или другого устройства):
Такой запрос выдается, когда вы соедините USB
кабелем компьютер и устройство Андроид.
После подтверждения, устройство будет доступно для выполнения команд
ADB. Проверить подключение устройства можно
командой «adb devices«. На этом скриншоте
видно, что через ADB интерфейс подключено одно
устройство:
Теперь можно выполнять команды ADB.
Что можно сделать с помощью ADB? Самые
распространенные задачи, которые можно выполнить через
ADB это:
- Создание резервной копии данных и приложений.
- Удаление предустановленных приложений, которые нельзя удалить через
графический интерфейс Андроид. - Изменение разрешений для какого-либо приложения.
Также, через ADB доступны некоторые консольные
команды Linux, такие как ls,
cp, top, ps, cat и так далее. Однако на Андроид доступны далеко не
все консольные команды Linux.
В общем случае команды ADB выполняются с
префиксом «adb shell«:
adb shell ps
adb shell ls
Но можно и войти в shell устройства и выполнять
команды уже «внутри».
Install ADB on macOS
Here, we will take a slightly different path to install ADB on macOS. We will have to install Homebrew first on macOS and then we can install the Android platform-tools easily. Homebrew is an open-source package manager that installs the missing packages. So with all that said, here we begin.
First of all, open the Terminal on your Mac and execute the below command. It will install Homebrew on your Mac. During the installation, it might ask for your password. The whole installation will take about 10 mins.
ruby -e "$(curl -fsSL https://raw.githubusercontent.com/Homebrew/install/master/install)"
After that, install the ADB platform-tools from the below command.
brew cask install android-platform-tools
Now connect the Android device to your Mac and execute the adb devices command. You will receive a prompt on your Android device to allow USB debugging. So, just enable the checkbox and tap on “Allow”.
You should now see the serial number of your device on Mac This signifies that ADB is successfully installed on your Mac.
Method to Fix “adb not recognized” Error
ADB
or Android Debug Bridge is a CLI, a portion of the Android SDK and Platform
Tools. It makes a bridge that makes communications possible between your
Android gadget and PC. The absolute and most significant Android customizations
can be done using ADB commands. Some of the functions of ADB are: bootloader
fastening, custom recover installation, booting your gadget to recovery or
fastboot mode, introducing APKs, and so forth. Among the large scale or errors,
the most widely recognized one is “adb not recognized” as a command,
operable program or batch file.
Let us see the different techniques
to fix this “adb not recognized” error.
Fix “adb not recognized”
Error
When
the ADB command isn’t verified by the Command prompt or PowerShell due to
missing variables related to the Android SDK this kind of error occurs. To fix
this “adb not recognized” error, make sure to initially fulfill requirements.
- You ought to have the most recent form of Android SDK and Platform Tools.
- USB Debugging should be authorized on your gadget: Go to Settings > About Phone > Tap on Build Number multiple times > Go back to Settings > Developer option > Tap on the USB Debugging switch.
The
above two mentioned points are just the initial settings one needs to complete.
These won’t completely resolve the issue but will minimize it.
To
solve the error completely a step by step guideline is provided.
Missing
Environmental Variables
- Click on the Windows symbol and go to Advanced System Settings.
ADB not recognized
2. Next, click on Environmental Variables. Just beneath settings, it will be the last option.
3. Under the equivalent, you will see two segments: User Variables and System Variables.
4. Double-tap on the Path key, inside the system variables section.
5. Click the Browse option, when the edit environment variable will come-up.
6. Navigate to the area where you have introduced the ADB and Fastboot parallels and select the platform-tools folder and click on OK.
7. The chosen variable will be effectively added to the environment variables. Click OK and close the dialogue box.
8.
Under Environment Variables check the system factors. The path segment will
likewise be having a recently included variable path. Close this dialog and close
the System Properties exchange by clicking on OK.
The
error for missing environmental system variables has been rectified and
implemented effectively. The “adb not recognized” error has been fixed now
successfully.
Check the
adb error fix
There
are two techniques for checking whether you have effectively rectified the
error for “adb not recognized error” or not.
The
first includes the utilization of Command Prompt while the subsequent one is
through PowerShell Window. For both these strategies, you will initially need
to explore inside the ADB and Fastboot’s platform-tools directory.
Evaluate any of the two underneath
techniques:
- Using Command Prompt: Open the CMD; command prompt window inside the platform-tools folder. Command Prompt window will pop once u hit the enter button. to get a list of all ADB commands and their functions and utilization type the keyword adb inside the CMD. In this situation, the fix for “adb not recognized” error has been effectively executed.
- Using PowerShell Window: To open PowerShell inside the platform-tools folder, press shift key along with right-clicking on the mouse inside the folder. Open PowerShell by clicking on the option that says Open PowerShell here. Enter the adb command and if u get an output of a list of all ADB commands, you know that the adb not recognized error is fixed successfully.
Part 2. Enable USB Debugging on Your Mobile Phone
USB debugging must be turned on in order to use ADB. The steps to turn on USB debugging are varied on different versions of Android OS, but the instruction below should work for most Android smartphones used nowadays.
- Step 1. Go to Settings > About phone.
- Step 2. Scroll down to find and tap Build number for 7 times.
- Step 3. Back to Settings, then find and tap Developer options.
- Step 4. Within Developer options, enable USB debugging. Confirm your choice.
- Step 5. Connect your phone to PC.
- Step 6. Choose Allow when “Allow USB debugging?” window pops up on your phone screen.
Note: It is suggested that tick Always allow this computer if you are using a trusted computer in order to get smooth experience with ADB and in case of accidents when you need to rescue data but unable to operate on the phone, like Android broken screen data recovery.
How to Install ADB Drivers of Android device:
Step 1. Make sure you have USB debugging enabled in your Android device. For this:
- Go to Settings > About phone, and then tap ‘Build number’ 7 times.
- Go back to Settings, then choose ‘Developer options’.
- Find the ‘USB debugging’ / ‘ADB Debugging’ option and use its toggle button to enable it. Accept warning by tapping on OK button.
Step 2. Connect your device to your PC/Laptop using a properly functional USB cable. Now launch the downloaded ADB file.
Step 3. Select your device from the list & click on Install. This process might take 2-3 mins to complete.
Step 4. Once the process is completed, you’ll see something similar to this:
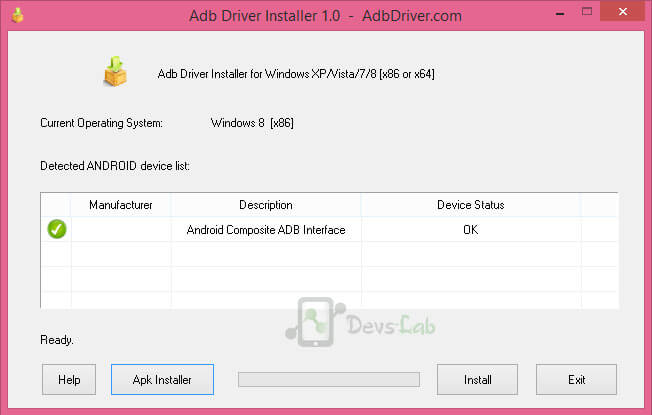
ADB Drivers for all Android device
Step 5. Now you have completed the process. You can use ADB to modify/tweak system files.
Now you are all set to perform debugging operations. To learn how to modify Android files, you can refer Minimal ADB Tool. This drivers works with any Android device as its built for “Android OS” & it works with any device running on Android OS. Whether its Gingerbread or Android Marshmallow.
What is ADB
Android Debug Bridge or more widely knows as ADB shell is a command line tool that helps developers access advanced settings and debug Android apps and system settings. Besides from debugging, you can use ADB shell to back up the android device, install apps on your SD card by default, disable specific features of an app, transfer files, etc. In fact, you can even use ADB to make system level changes.
Generally, ADB is bundled with Android SDK (Software Development Kit). So, if you’ve installed Android SDK then you already have access to the ADB shell on Windows 10 with several other essential tools like Fastboot. However, if you are not a developer and don’t want to install the complete Android SDK package for just one tool that is only used occasionally then you can install ADB on Windows separately. i.e, without installing Android SDK.
Related: How to Run Android Apps on Ubuntu
Install ADB on Windows
Now head over to the extracted folder, and click on the address bar. Now, type “cmd” and hit enter. Instantly, a command prompt window will open up in the ADB directory.
After that, connect your Android device to Windows PC and execute adb devices command.
- It will prompt a “USB debugging” prompt on your smartphone. Enable the “Always allow” checkbox and then tap on “Allow”.
- Now, you should see your device’s serial number in the Command Prompt window. If it does not detect your device then run again and this time, it will definitely detect your device. Congratulations! ADB is now successfully installed on your Windows PC.
Install ADB and Fastboot Drivers
Google USB drivers are required to perform ADB debugging with Android devices. Generally, when you connect the Android device to Windows 10, it will automatically download drives via Windows update. But in case it didn’t
- Click to download the Google USB Driver (8MB ZIP file)
- After download, extract the ZIP file.
- Open “Device manager”.
- Find Portable Devices.
- Right-click on your phone name and Update driver.
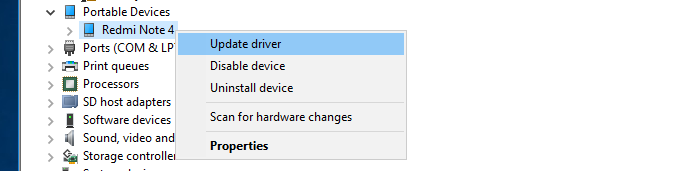
- Select Browse my computer for Driver Software.

- Now Navigate to the driver folder using the browse button. Select the extracted folder and click on next.
If everything goes right Google USB driver should be installed and your computer will recognize your phone just fine.
How to Install ADB on Linux OS
- Download the ADB ZIP file for Linux and extract it on an easily accessible location like the desktop.
- Open the terminal and enter the following command: cd /path/to/extracted/folder/
- The directory will be changed to where you extracted the ADB files. (e.g: cd /Users/Doug/Desktop/platform-tools/)
- Now, connect your device to computer using the compatible USB cable. Make sure to change the USB mode to “file transfer (MTP)” mode. This ensures that you won’t be facing any issue due to USB connection.
- Once the terminal is in the same folder where the ADB tool is located, execute the following command: “adb devices” to launch the ADB Daemon.
- Check your device; it will ask you to “Allow USB Debugging” in a prompt window. Go forward and grant it!
- Finally, re-enter the command from Step #5. If everything is successful, you should see the device serial number on the macOS’s Terminal window.
Hurray! You can now run ADB commands on your device! Go forward and start modding it! Check out our Custom ROM or Official Firmware section; I hope you will get something helpful!
Some Linux users can install ADB driver more easily on their computers. The above-mentioned tutorial will surely work for you but if you are using Debian or Fedora/SUSE-based distro of Linux, you can skip step #1 of the tutorial and use the following piece of command:
- Debian-based Linux users can type the following command to install ADB: sudo apt-get install adb
- Fedora/SUSE-based Linux users can type the following command to install ADB: sudo yum install android-tools
Any Problem? If you encounter any problem, please comment below, and we will get back to you as soon as possible.
Please don’t forget to share if you have found this post helpful!
How to Setup ADB (Android Debug Bridge)
Note: Setting up ADB on a computer is just half of the sum since you need to set up your device before starting the tutorial to accept the ADB commands.
- Go to the settings option on your device.
- Scroll down and tap on About device (This may be hidden behind the “System” option if you are in Android 8.0 Oreo).
- Now tap on “Build Number” 7 times to enable Developer Mode. You will see a pop-up toast when the Developer Mode is enabled.
- Now go back to the Setting, and enable USB Debugging mode option.
- You are partially done with setting up your device. Now head to the tutorial below on how to install ADB for your particular operating system.
Проблемы EasyTether: невозможно подключиться по ADB
Некоторые люди, использующие как Mac, так и Android, пытаются поделиться своим интернет-соединением через интерфейс USB с помощью приложения EasyTether. Тем не менее, мы не рекомендуем это. Приложение стоит денег, и существуют бесплатные методы, которые одновременно превосходят и просты в использовании.
Например, в более новых версиях Android Google предлагает собственный модем Bluetooth и USB. Если ваш телефон имеет дизайн с двумя антеннами, вы даже можете создать точку доступа, используя соединение Wi-Fi.
Если EasyTether (или любое приложение USB-модема) не работает, лучшее решение — найти правильный драйвер, как описано выше. Это означает, что нужно найти неправильный драйвер ADB, установленный Windows, и заменить его на то, что работает.
Это может потребовать дополнительных действий по устранению неполадок, поэтому мы рекомендуем эти приложения только для старых устройств Android, которые не поддерживают новейшие технологии привязки.
Теперь вы знаете, что делать, когда АБР не работает. Этот метод очистки плохих драйверов USB для Android и установки драйверов Koush работает на всех устройствах Android, на которых мы его пробовали. Немного смешно, что Google никогда не выпускал универсальный драйвер ADB для устройств Android, несмотря на проблемы, с которыми продолжают сталкиваться многие пользователи.
Download Google USB Drivers
Now, there are two different ways/methods to download the USB driver on Windows. You can either download the Google USB Driver ZIP file manually. Or, you can use the SDK Manager in the Android Studio to download it.
The latter gives an added benefit, that is the SDK Manager will automatically notify you when a newer version is available. The former method, on the contrary, will require you to manually check if a newer driver version is available and download it again.
In our personal experience, downloading the ZIP package directly is easier than using the Android Studio. But the choice is solely up to you. We have covered both the methods below.
Note: If you’re using macOS or Linux, you would not need these drivers.
Direct Download
Just click on the link below to download the Google USB Driver ZIP file to your PC.
- Latest version: usb_driver_r13-windows.zip
- Previous versions:
- usb_driver_r12-windows.zip
- usb_driver_r11-windows.zip
- usb_driver_r10-windows.zip
Once downloaded, extract the ZIP file to a suitable location on your computer. The extracted ‘usb_drivers’ folder should contain the required ‘android_winusb.inf’ driver file.
Download via Android Studio
First of all, make sure that you have downloaded and installed the on your Windows PC. Once you have it installed, follow the instructions below:
- Launch ‘Android Studio’ on your PC.
- Click on ‘Tools’ and select ‘SDK Manager’.
- Go to the ‘SDK Tools’ tab.
- Select ‘Google USB Driver’ and click on ‘Ok’.
- Finally, click on ‘Ok’ when prompted with the ‘Confirm change’ message.
- You should see a ‘License Agreement’ message on the screen. Simply select ‘Accept’ and click on ‘Next’.
Android Studio will now download the Google USB drivers to ‘android_sdk\extras\google\usb_driver\‘ on your PC. Here ‘android_sdk’ is the folder where the Android SDK is installed on your PC.